MKIII Golf/Jetta Ball Joint Replacement.
 This
"how to" assumes you have some basic tools, and safety gear. Safety glasses
should be worn at all times when working with tools and automotive fluids.
Always use a hydraulic jack and safety stands when lifting or getting under a
vehicle. If you are unsure on where to safety lift your vehicle, refer to its
owners guide. Steering and Suspension components should never be heated with a
torch, bent, or welded. Replacement parts must be direct matches and should be
torqued to specification. The writer of this how to assumes zero liability
in how to use this guide, or any damages that may come from it to you, your
property, or others and others property. If you are uncertain at any point,
refer to a qualified automotive technician.
This
"how to" assumes you have some basic tools, and safety gear. Safety glasses
should be worn at all times when working with tools and automotive fluids.
Always use a hydraulic jack and safety stands when lifting or getting under a
vehicle. If you are unsure on where to safety lift your vehicle, refer to its
owners guide. Steering and Suspension components should never be heated with a
torch, bent, or welded. Replacement parts must be direct matches and should be
torqued to specification. The writer of this how to assumes zero liability
in how to use this guide, or any damages that may come from it to you, your
property, or others and others property. If you are uncertain at any point,
refer to a qualified automotive technician.
Ball joints have a hard job. They have to twist,
arc, and hold the weight of the entire car on them. Ball joints sounds
like a major suspension job, but its really pretty easy. The MKIII model
line has a total of two ball joints one at the end of each front lower control
arm. Generally they last a long time, and don't complain much. I'd
say 100,000 miles is not unheard of in the life span of them. They are
much like a simple ball and socket that is in your shoulder. There is a
rubber boot, and they are "sealed for life".
You may have heard that some cars have "upper" and "lower"
ball joints. Since your MKIII has a McPherson strut deigned (named for
Earl McPherson, a Ford engineer in the 50's). you only have lower ones.
More complex suspension designs have both. The top of your strut (bearing)
is in effect the upper ball joint.
Never add any type of grease to a sealed joint.
Some aftermarket types may have a grease fitting, if so they are not the
original ones and may be greased. If the boot is torn, I'd just install a
new joint, I don't think you can get new boots. The reason why you should
not just shoot grease, or WD-40 into them is because they have a plastic
"socket" that the ball sits in. Adding a petroleum based grease will only
cause the joint to fall apart sooner.
How can I tell its bad? Well, testing for a bad ball
joint is easy.
1 - Noise, if the joint, squeaks or squawks on turns and
bumps
2 - The boot is torn open
3 - When you grab the tire/wheel at 12 and 6 o' clock and move it back and forth
and the joint has free play...
4 - You've lowered your car and the joint is stressed at abnormal angles, hey I
love the look, but your ball joints now take a real beating, check them often.
5 - There is a clunking sound over bumps and poor steering control.
Installing a new joint is cheap, easy, and can be done
with simple hand tools in a driveway in less than an hour. No special
tools or presses are needed. Shop around, German OEM Meyle ball joints can
be had for as low as $30.
While a trip to an alignment shop is a
good idea after installing a new steering or suspension component, I don't feel
its 100% needed after this job. The fact is there is only a very slight
amount of wiggle room that the ball joint needs to be installed. Sure its
going to change camber *a little* a very small amount. So small I'd skip
it. - However, if this were a *Customers* car, I'd say they should get one.
Parts Needed: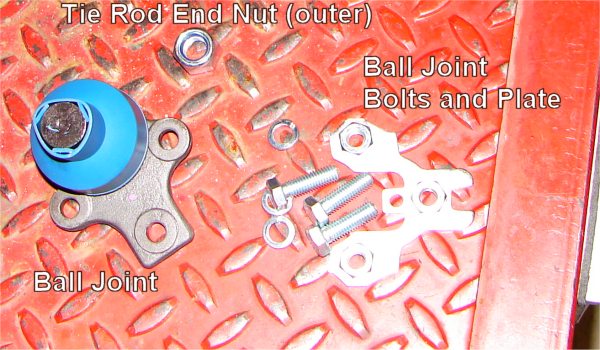
Ball Joint
Ball Joint Hardware Kit (nut plate, bolts, and lockwashers)
Tools Needed:
17mm wrench and deep socket (1/2 Drive) and ratchet.
Torque Wrench (1/2 drive and 3/8 drive)
13mm Deep Socket and ratchet.
Nice prybar.
PB Blaster/Liquid Wrench/CRC Power Lube
Jackstand and Jack
Helpful Friend
Optional:
Trip to alignment shop.
Consumables:
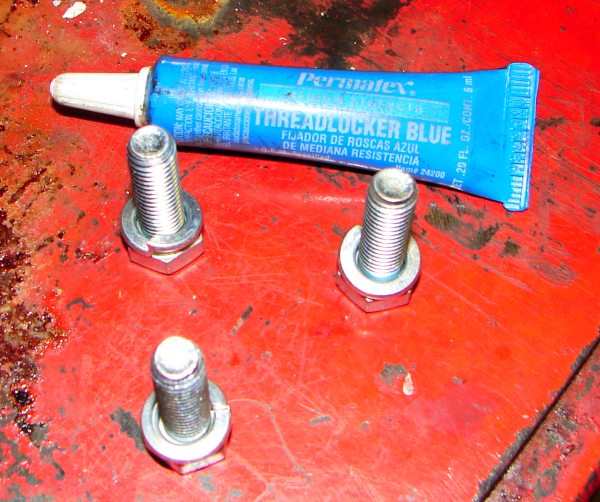
Blue Locktite
CRC Power Lube or PB Blaster
|
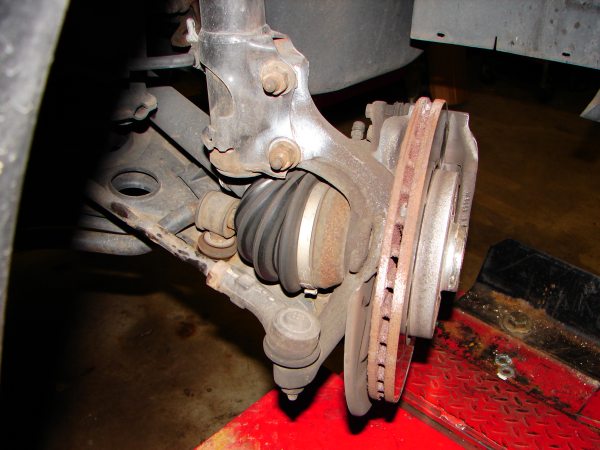
Step 1 - Lift and support the car on jack stands.
Give the car a good shake to make sure its not going to fall on you when your
working on it.
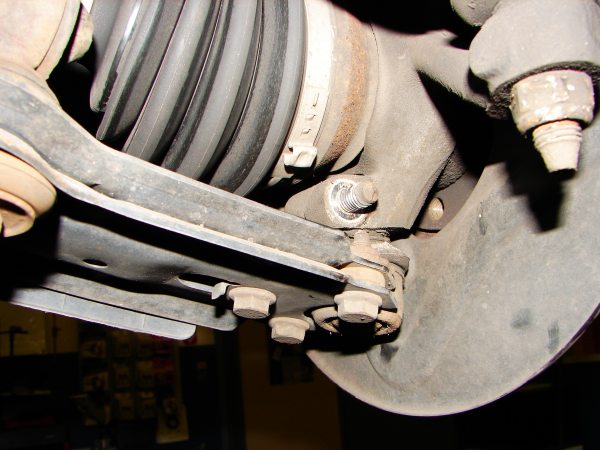
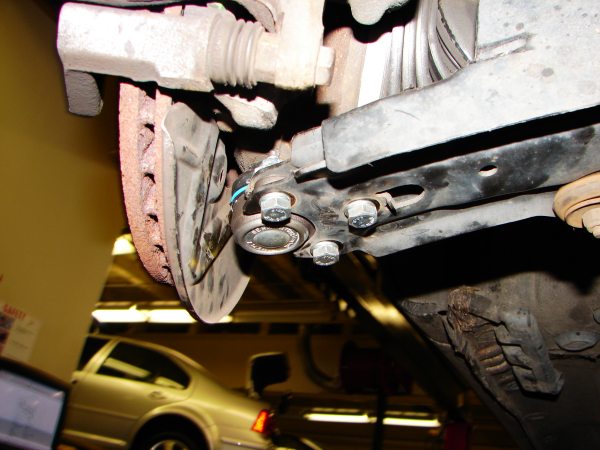
Step 2 - Get to know the parts Spray
some penetrating oil on the parts with arrows on them, make sure not to get any
on the brake rotor or pads.
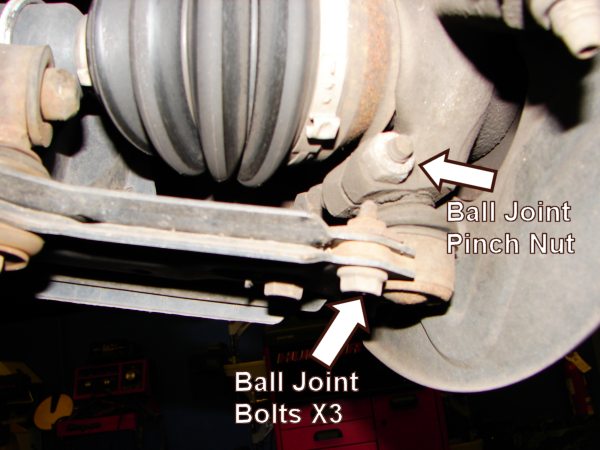
Step 3 - Loosen and remove the Ball Joint Pinch
bolt nut. (removed)
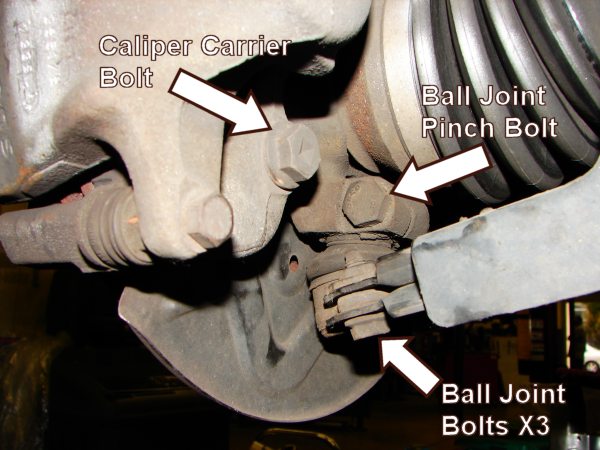
Step 4- Remove the caliper carrier bolt, and then
slide (without a major hammer here...) the ball joint pinch bolt out. If
its sticks a light tap is fine but don't damage the threads.

Step 5 - Pry Down

Step 6 - Remove the 3 small 13mm bolts (the nuts as
shown are welded to the plate). If the heads of the bolt(s) break, don't
worry.
MAKE A MARK TO LOCATE THE UPPER PLATE SO THE NEW ONE
CAN BE LINED UP!
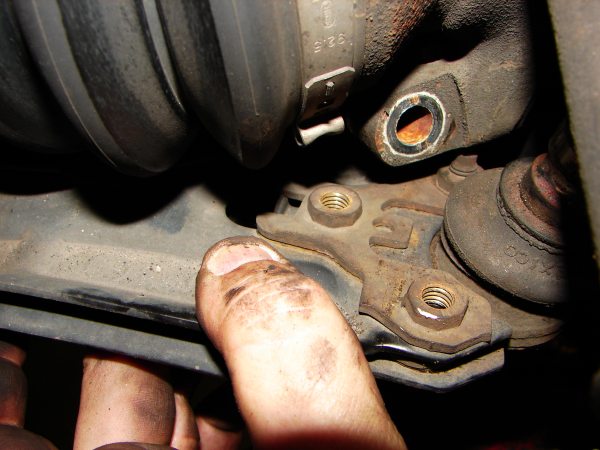
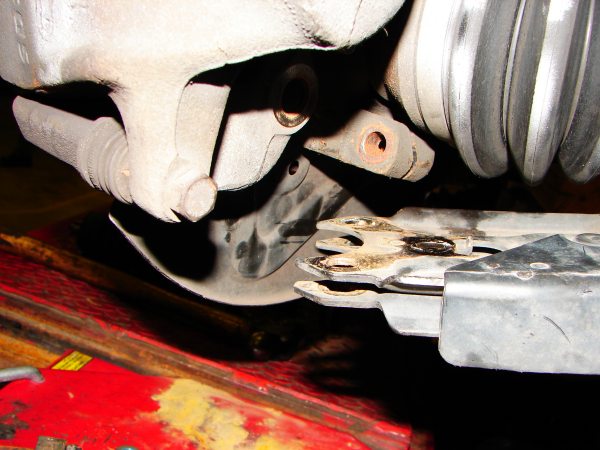
Step 7 - Remove the nut plate.
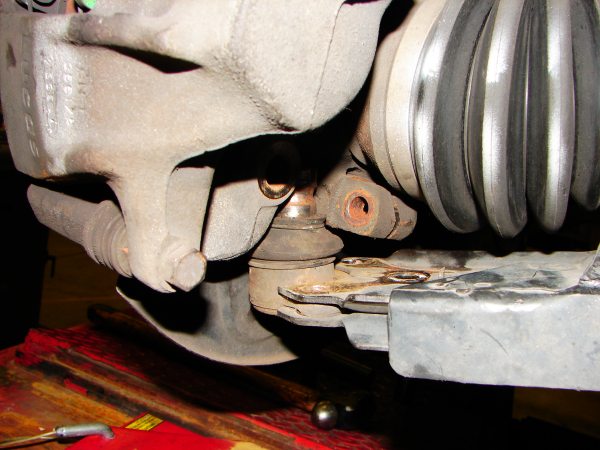
Grab that friend and have them pull out on the steering
knuckle. Then you can slide out the joint. Don't pull more then you
have to. You don't want to blow the CV joint apart.
Step 8 - Add blue thread locker to the threads of
the new ball joint bolts. Make sure you install the lock washers on the
bolts.
Step 9 - Grab your friend again, and reinstall the joint,
nut plate, and bolts. Torque the 3 ball joint bolts to 26 ft lbs,
and the main ball joint pinch bolt to 37 ft lbs, and the wheel to 81
ft lbs.
A job well done.
Review the
Pre-alignment tips.
Home