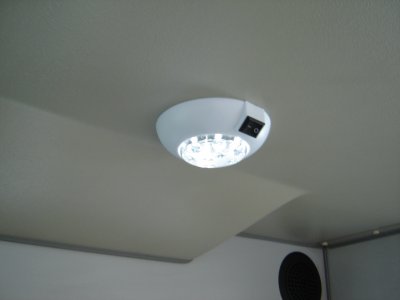
Rear reading light
8 LED lamp - draws near zero power - great for camping. Marine store $19.
New center light - out of a 91 Passat - $4 - Ebay!
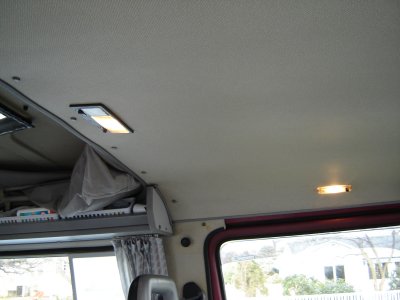
Has a nice 10 second delay once the doors are closed. Plus - the passenger gets a map/overhead light.
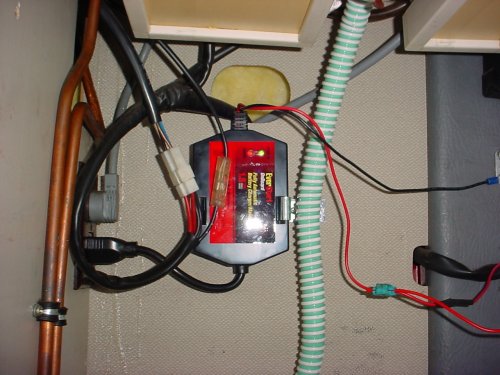 Under
Kitchen Sink - Automatic Floating Battery Trickle Charger - active when
van is plugged into 120V A/C - 1.5 amps - keeps batteries happy all winter
long! Note the spare "secret" plug under the sink! Whoot!
Under
Kitchen Sink - Automatic Floating Battery Trickle Charger - active when
van is plugged into 120V A/C - 1.5 amps - keeps batteries happy all winter
long! Note the spare "secret" plug under the sink! Whoot!
Kitchen upgrades;
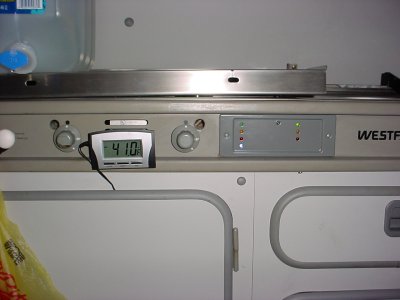
Added a cheap thermometer. Had to repaint my water/battery panel - it was rusting. Added a Cool-Blue LED - turns out my LED was loose, so I just soldered in a blue one from Radio Shack. - Note the coolness of 41.0 Deg on a warm summer day!
Here's a copy of a post on how I got my Fridge to work on Gas again..(4/04)
Welp, this past weekend, getting Schultz
ready for Westies in the Woods, I tried the fridge. Since I got the Vanagon
last year, I tried the fridge a few times, but had no luck. It was not a
real big issue, but I just wanted everything to work. It seemed to work fine
on 120 and 12v, propane was another issue! I had added a small Pentium
cooling fan to the rear heat exchanger to get a little more air flow with an
LED and a switch.
So this year, I thought I'd give it more of a shot. I read all the good data
over at Vanagon.com and came up with a
few of my own ideas.
1 – the PO had used the fridge, but never maintained it. Even cleaning it
was beyond them. Years of exploded coke cans and eggy- goo had built up
inside of it it and its little cooling fins. Yikes – they are sharp.. clean
with care. I used "Awesome" (Dollar store) cleaner – worked REALLY well.
2 – Took off the outer cover off the flue-vent and blew some compressed air
into the exhaust and intake of the unit – oh my – the crap that flew out… I
must have blown at least 2 lbs of rust, "gray matter", dust, bugs, and other
debris out of the unit.
3 – Took off the water drain – nothing came out. Good, I look down – close
and see that the entire drain is jammed with rust and carbon debris! I took
a pick and started to see that the crap was jammed into the tube 6"! I would
pick, blow air, pick, blow air – and finally gave up (what the hell, its all
ready broke..) and shoved a rubber tipped blow gun with 120 PSI into the
drain. At first – nothing then a nice "FOOSH" sound and air flow!
4 – I primed the system by running the stove for 45 seconds – 5 pumps of air
– lit right up. I then turned my eye to the little non- visible "visible"
flame down in the corner of the unit and yup – she was a burnin! However the
LED on the front stove panel was not on.
5 - Took apart front panel, found LED was loose - solder joints had broken, replaced it.
 Spare
battery setup - Small 12 volt sealed lead acid, hacked and stolen from
$20 "Jumper Box" - I have 3 more to hack, the wood is my high tech holder to
keep it from sliding about..
Spare
battery setup - Small 12 volt sealed lead acid, hacked and stolen from
$20 "Jumper Box" - I have 3 more to hack, the wood is my high tech holder to
keep it from sliding about..
Want to do this yourelf? Go Here.
Speakers 6X9"
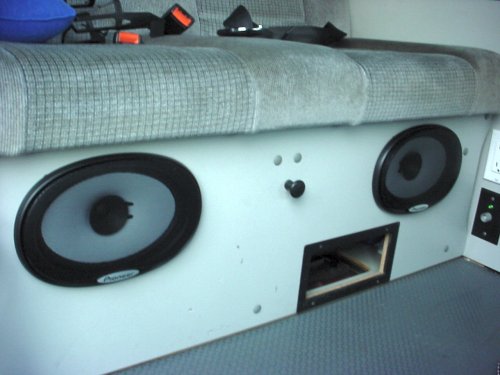
Pioneer, disconnected the stock worthless speakers in the back. Sounds good to me!
Used a "RotoZip" with a plywood bit. Worked great, made dust. Clean cuts. Note missing rear heater unit. Took it out because it was leaking. Since I drive mainly in the summer, I just got some free storage space under the seat.
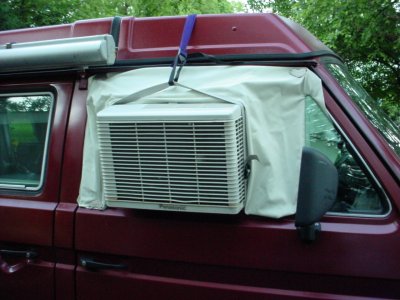
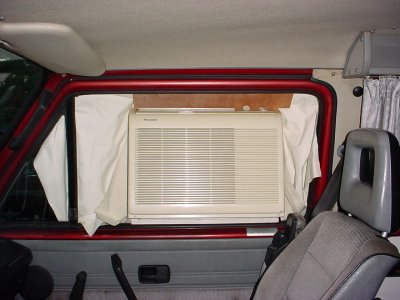
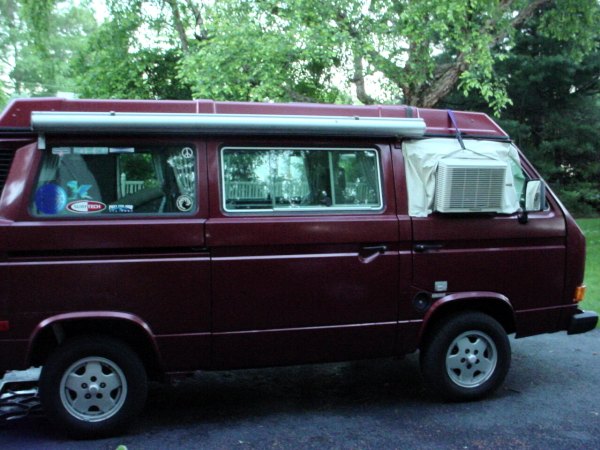
The A/C unit is a nice 5000 BTU, lower wattage Panasonic unit from about 1991. I used simple straps from REI - ties into the luggage rack. Used some canvass to make the "seal" and a piece of wood to help deflect the air flow inside the camper. Light, simple, 1 person setup job.
Dechromed look
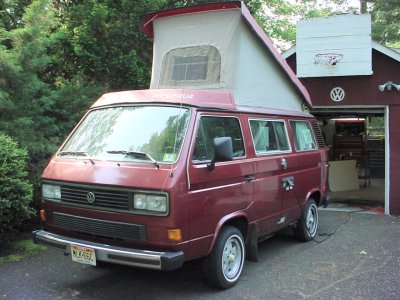
The "chrome" window molding had to go, as well as the faded chrome lip around the grille. I pulled out the window molding and left the gap in place. My windows didn't fall out, and they don't leak. I then removed the grille, and sanded it, painted it with three (3) coats of flat back paint. I did the same to the lower grille.
 After
After
Looks heaps better (also, added the WeatherTech window guards A+ if you ask me, they are really nice on rainy/windy days. Pulled off the chrome rain gutter rails, and just stuck on door-edge guard. Why pay more at the VW dealer? Its the same crap. Also, lost the white walls.
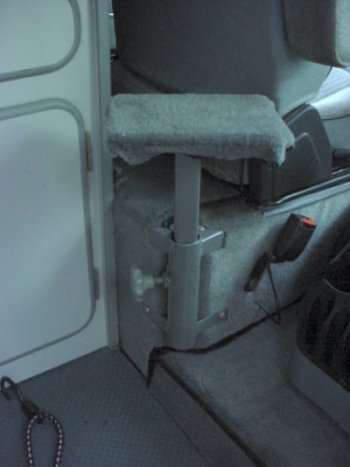 The
Upper bunk step. Square tubing ground down to fit in a round hole.
Some stock metal, a welder and some left over carpet from when I re-carpeted
the front.
The
Upper bunk step. Square tubing ground down to fit in a round hole.
Some stock metal, a welder and some left over carpet from when I re-carpeted
the front.
Ford Engine "Gray" Paint is almost the same color as the original Westy Trim.
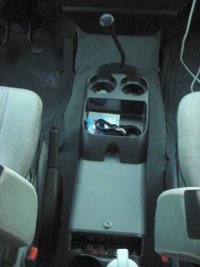 Center
Console, got it at a discount department store - for $30.
FOUR CUP HOLDERS! Does not
hit the shifter. Holds CDs, maps, coin tray, goodies, 2 way radios,
glasses, binoculars, you name it. Nice slide lid. I added a 2X12
underneath it to give it weight and added a few drywall screws into the base
so it has "teeth" - the end result - no sliding, but it can be moved in a
jiffy.
Center
Console, got it at a discount department store - for $30.
FOUR CUP HOLDERS! Does not
hit the shifter. Holds CDs, maps, coin tray, goodies, 2 way radios,
glasses, binoculars, you name it. Nice slide lid. I added a 2X12
underneath it to give it weight and added a few drywall screws into the base
so it has "teeth" - the end result - no sliding, but it can be moved in a
jiffy.
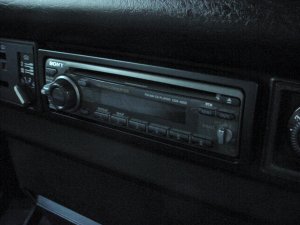
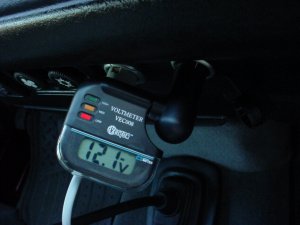
Dual cigar lighter, CD player (Crutchfield says it won't fit, wrong, its tight, but it fits..) - Voltmeter, can be moved around so I can see it when I am camping or driving. (GoWesty)
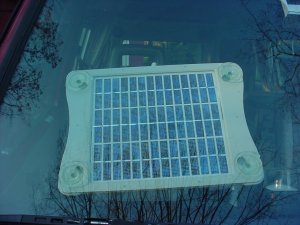
Portable solar panel - keeps battery happy while camping, plugs into cigar lighter.
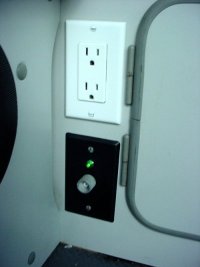
Added a modern nice style outlet (rather than the ugly brown one), sprayed the circuit breaker panel black, added a neon lamp to show when A/C power is live
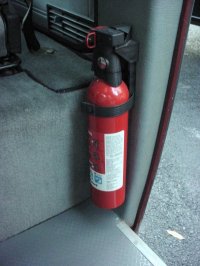 Fire
extinguisher - Modern ABC unit with meter to show pressure - perhaps the
most important upgrade for a Vanagon.
Fire
extinguisher - Modern ABC unit with meter to show pressure - perhaps the
most important upgrade for a Vanagon.
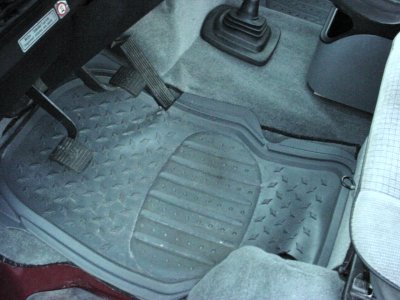 Floor
mats - Cut to fit with a razor blade. Wow Wee. I am not
paying $40 for a "custom set" I can make my own. The big trick?
They are backwards!
Floor
mats - Cut to fit with a razor blade. Wow Wee. I am not
paying $40 for a "custom set" I can make my own. The big trick?
They are backwards!
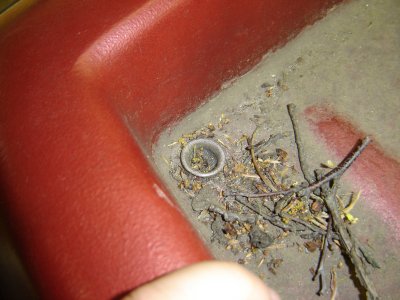 Added
small sink-aerators - that act as strainers to the luggage rack - they keep
crud out of the drain holes! Got the idea from
Added
small sink-aerators - that act as strainers to the luggage rack - they keep
crud out of the drain holes! Got the idea from
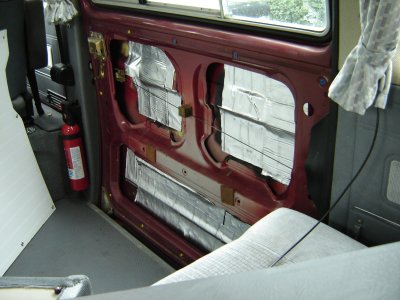
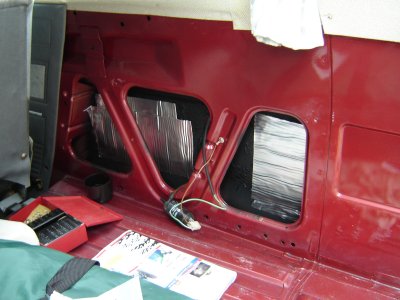 This is a material that I used for sound insulation, its called "PEEL AND SEAL"- made for mending roofs and flashing. It comes in a 6"x25'
roll, self adhesive, foil backed, and about 1/16" thick of rubber. The
stuff is AWESOME! Its just like Dynomat or B-Quiet, only for $12/roll!
Made a BIG difference in how much sound enters the cabin. The metal
its against now sounds like a Lexus when you tap it. No more "bonk
bonk" - thud thud. I did this while I was killing rust, so I had
pulled out the OEM Fiber-Glass insulation. This stuff is 1000x better!
Got it from a local discount hardware store (Lowes, roofing section).
This is a material that I used for sound insulation, its called "PEEL AND SEAL"- made for mending roofs and flashing. It comes in a 6"x25'
roll, self adhesive, foil backed, and about 1/16" thick of rubber. The
stuff is AWESOME! Its just like Dynomat or B-Quiet, only for $12/roll!
Made a BIG difference in how much sound enters the cabin. The metal
its against now sounds like a Lexus when you tap it. No more "bonk
bonk" - thud thud. I did this while I was killing rust, so I had
pulled out the OEM Fiber-Glass insulation. This stuff is 1000x better!
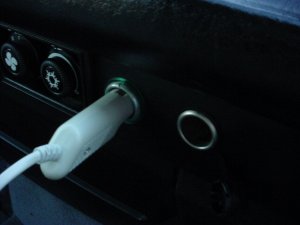
Got it from a local discount hardware store (Lowes, roofing section).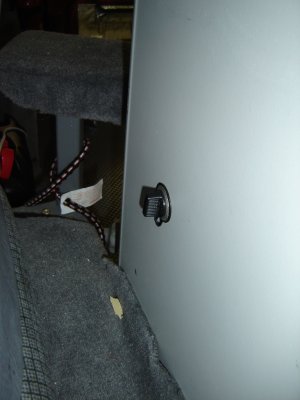 Added
a cigar-lighter socket behind the driver's seat that is wired into the 12
volt spare battery, along with the charger.
Added
a cigar-lighter socket behind the driver's seat that is wired into the 12
volt spare battery, along with the charger.