The Great MKIII ABA 2.0 Camshaft, Valve Seal,
Lifter, and Spring Install.
If you are reading this, and have no idea about the
TIMING BELT -
GO READ THIS. -
I DO NOT explain the timing belt in this DIY!
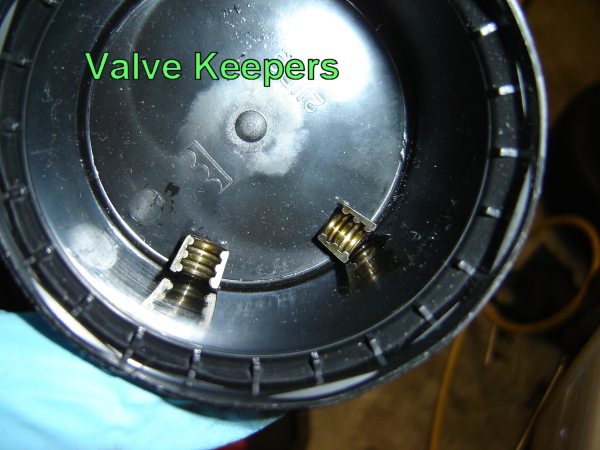
If you have no idea about a camshaft, valves, keepers, springs etc.. - GO READ THIS.
If you want another view of how to do this - Check this out! (mirror)
VR6 owner? Check This out!
| This "how to" assumes you have some basic tools, and safety gear. Safety glasses should be worn at all times when working with tools and automotive fluids. Always use a hydraulic jack and safety stands when lifting or getting under a vehicle. If you are unsure on where to safety lift your vehicle, refer to its owners guide. Hot boiling coolant will cause severe burns, and coolant is toxic when ingested. The writer of this how to assumes zero liability in how to use this guide, or any damages that may come from it to you, your property, or others and others property. If you are uncertain at any point, refer to a qualified automotive technician. Dispose of all waste materials based on your local laws. AT NO TIME SHOULD A HOT PRESSURIZED COOLING SYSTEM BE OPENED! |
|
|
Why Do This?
 The
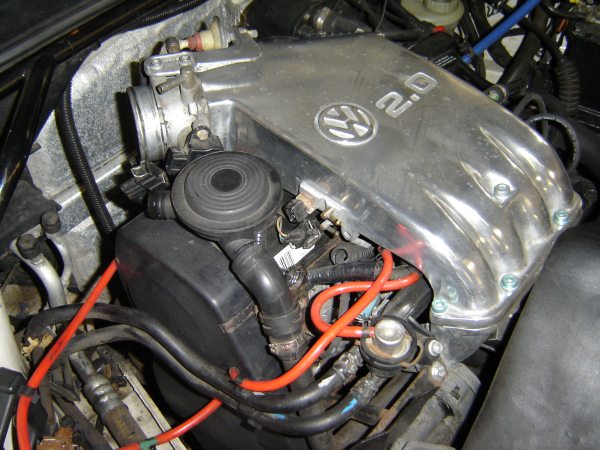
VW ABA 2.0 Gas engine is robust, thrifty, slow, yet very trust worthy.
Perhaps a little more air into the engine would help
out here. A cam should be able to help out here. By pressing
slightly farther down on a valve, or by holding it open longer, or changing the
timing the idea is that the engine might get a pit more pep. A cam will
only be affective as part of "the triangle" of a larger intake, cam, and
exhaust. Installing a cam with a stock intake or stock exhaust will limit
how much more power it can put out.
The
VW ABA 2.0 Gas engine is robust, thrifty, slow, yet very trust worthy.
Perhaps a little more air into the engine would help
out here. A cam should be able to help out here. By pressing
slightly farther down on a valve, or by holding it open longer, or changing the
timing the idea is that the engine might get a pit more pep. A cam will
only be affective as part of "the triangle" of a larger intake, cam, and
exhaust. Installing a cam with a stock intake or stock exhaust will limit
how much more power it can put out.
What cam should *I* buy? Well, that's up to you, ask around, do some homework. Are you planning to race or drive to work or school each day? Are you planning other engine modifications such as forced induction or head work? I installed an Autotech 260 cam. Its a very "mild cam" with good idle quality and a nice power band. I'll talk more about how it "felt" when it was all done. I did not get this car or cam dyno'd. I DO plan to finish up this install with a TT Chip. My car at this point in time has OBDI stock internals, a K&N air filter, a modded air box, header, and 2.25" TT exhaust with a Borla muffler.
How long this takes:
Well, its not something I'd want to have to finish up in a hurry. With a few breaks for beer, and lunch, it took me 6 hours. Keep in mind, I was not gunning flat rate, and it was a nice lazy Sunday job. Keep in mind, I did more then the cam itself, which you might not need to or want to do. Shop labor time pegs this job at 4.2 hours. Like I said, I was lazy, and took my sweet time.
I Don't have Shop Air, can I do this?
Yes, you can, you can use a rope (no kidding!) to hold the valves closed when
you remove the keepers.
See step 38 on this page.
I have to take the head off right?
Nope. Head stays on and in the car.
Since you tell me to do the timing belt, I need to do
the water pump right?
No, you don't need to open the cooling system at all for this upgrade. If
you have no idea what the stock timing marks look like - take your time in
getting to know them very well. The engine has to start 100%
perfect after the cam install in order to break it in properly.
I'm due for an oil change, can I do it now?
No, change the oil before you do this upgrade, run the engine
to at least get oil pressure up to the cam. Installing a cam, and then
starting an engine "dry" is a very, very bad idea.
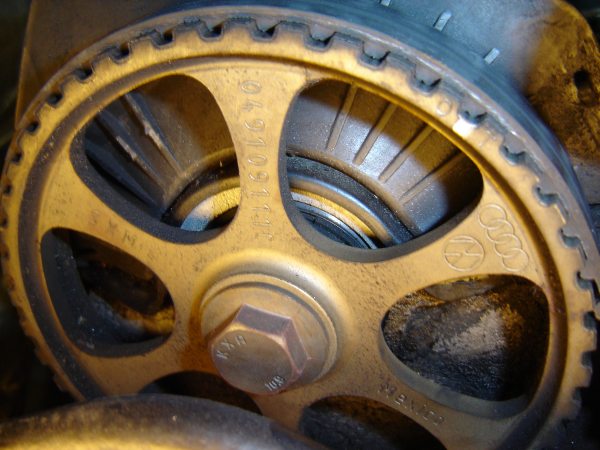
What about of those cool adjustable cam sprockets?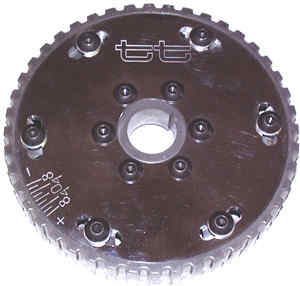 (see picture on right)
In order to really tune the power of a larger cam, say something bigger then a
cam I went with, I've found that most people get the most power gains with one
of these. They are also needed if the head deck has been raised or
lowered. I have a stock head, with a very mild cam. It was not
needed for me. Tuning a cam is best done on a dynamometer not by the seat
of your pants. One nice feature (in theory) is that you can adjust the cam
for track day, and then drive home and not piss off your passenger.
How much Mr. Reed?
Cam - $100
Springs - $90
Lifters - $90
Seals, Gaskets, Belt - $50
Tools I had to buy - $120
Chemicals - $30
Total - $480. Add a chip, and its $580.
A few terms.
Tappet, Bucket, Lifter, Cam Follower = all the same thing
Spring Hat, Spring Retainer, Spring Top = all the same thing
| Why you need more
then a cam: Ok, a few ground rules, First rule is to never re-use a timing belt. For the $13 for a new one, its a flat out bad idea. If your due for a belt, go see that DIY and get the belts and tensioner while your at it. Second rule is, cams and lifters (or followers) should always be replaced as a set. They are wear matched to each other, and the cam break in period sets this wear pattern, and its critical for the life of the cam and lifters. Third rule is, fix what ever seals you have access to while this stuff is apart, this goes for the cam seal, valve cover gasket (cam cover gasket), and if your going down there, replace the valve seals too. This was the reason for all of this, on cold starts my car would smoke a bit and misfire, typical aged valve seals. Fourth rule is to keep everything clean as can be. Were working with internal engine bearings folks, not bike chains here, and a spec of dirt, or metal in the wrong spot can ruin the cam, lifters, valves, or the head in a jiffy. Fifth, while some feel its not needed with a 260 cam, dual rate valve springs are going to help things out at higher RPMs. OBDI ABA engines came with these stock, OBDII cars did not. See the note below about this change!! |
96 and later cars Note: If you are doing this on a OBDII (1996) or later 2.0 - These engines came with single stage/rate valve springs. If you plan to upgrade to the dual rate (OBDI style) or HD springs - you WILL need new spring seats these are NOT SHOWN IN THIS DIY! Also, OBDII cars use other types of lifters (cam followers) as well, and require the older dual rate style springs in the OBDI design.
Tools Needed:
(Everything from the Timing belt DIY PLUS..)

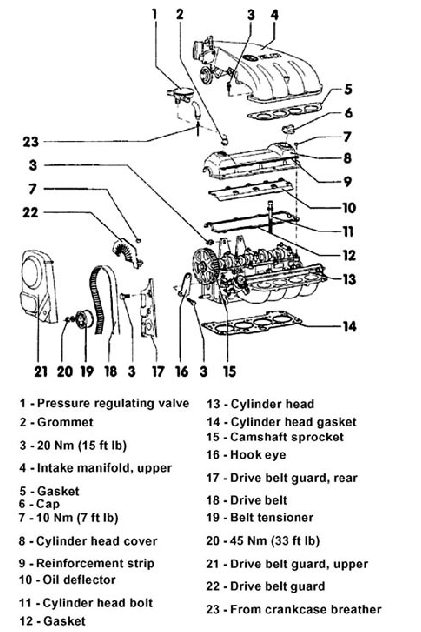
12 -
OHV Valve Spring Compressor Optional Stuff:
|
Step 1 -
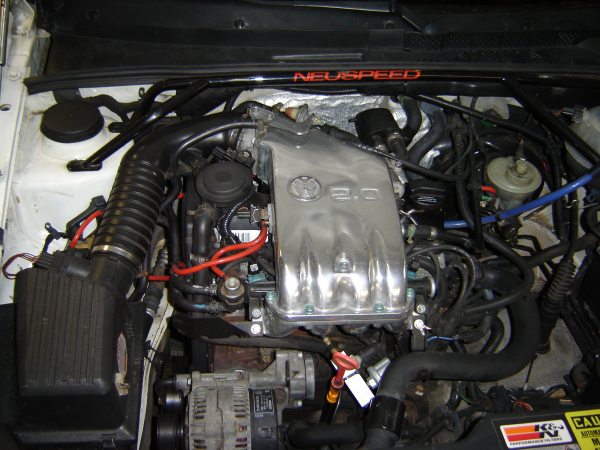
Start by taking off the air intake, air box, elbow and so on.
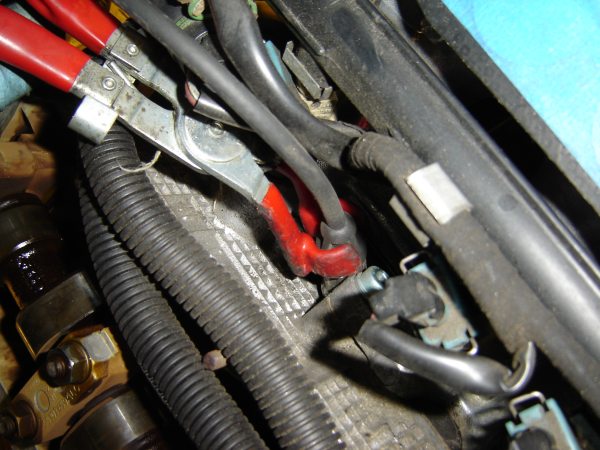
Step 2 -
Unplug the sensors from the EGR (OBDI) (this is under the back of the intake), TPS (three wires at throttle), IAT (Intake air temp) next to breather, and IAC/ISV (OBDI) next to the oil cap. Unhook all the lines from the intake, leave the fuel lines on, we will not bother with them.
Unhook the throttle cable, and EGR line at the rear of the intake.
Remove the 5 allen bolts at the front of the intake, and the two at the rear of the intake.
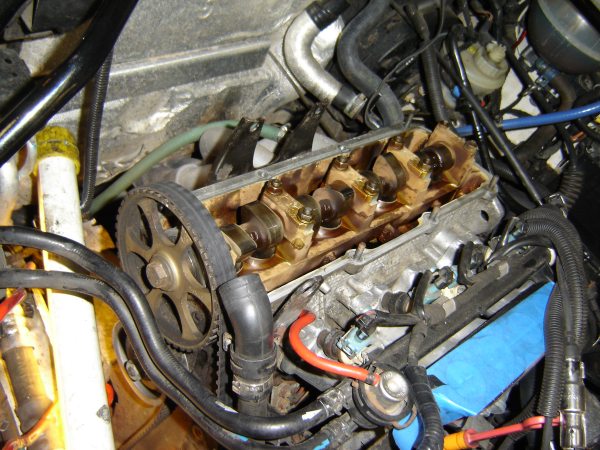
Step 3 -
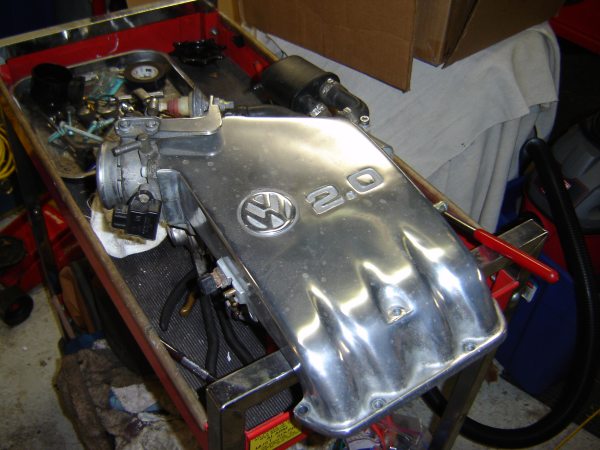
Lift intake off, and clean it if you wish, or clean the throttle body.
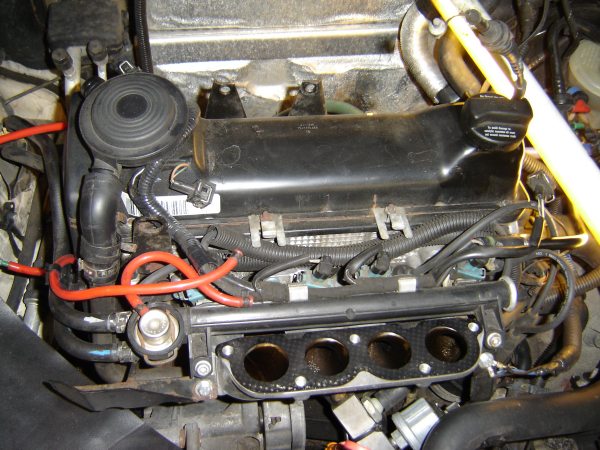
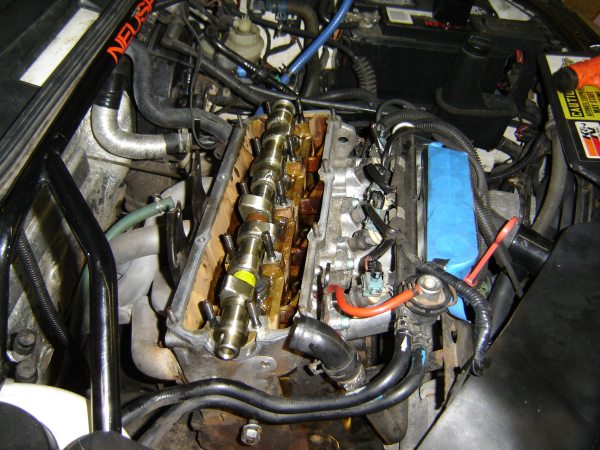
And at this point this is what things should look like.
Step 4 -
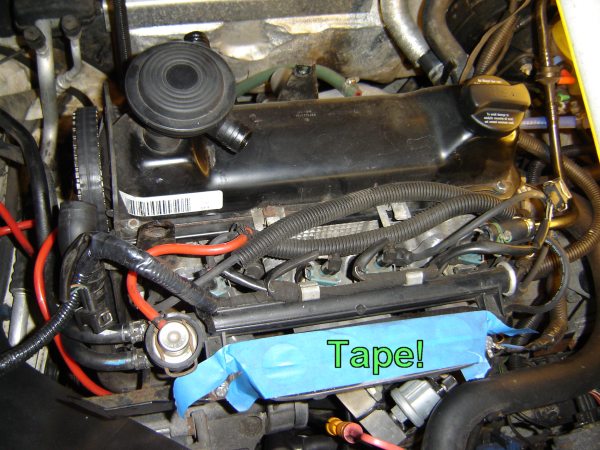
Place tape over the intake ports. If crap falls down here, your kinda screwed, so keep the crap out of the ports ok?
Step 5 -
As descried in the timing belt
DIY, remove the belts, and remove the side timing covers (see steps
5 through 6 and then 15 through 23)
Don't take the belt off YET! I'll tell you when you can do so!
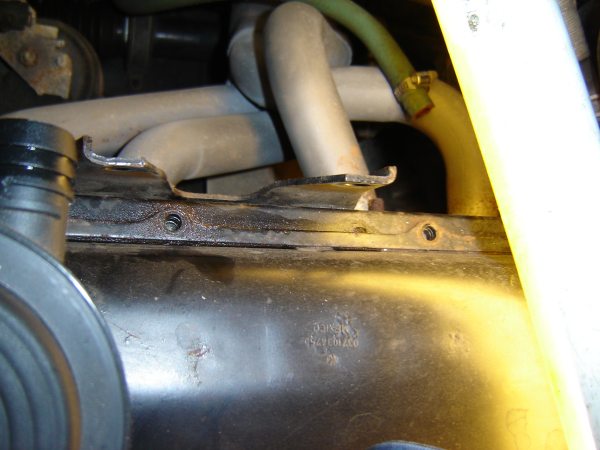
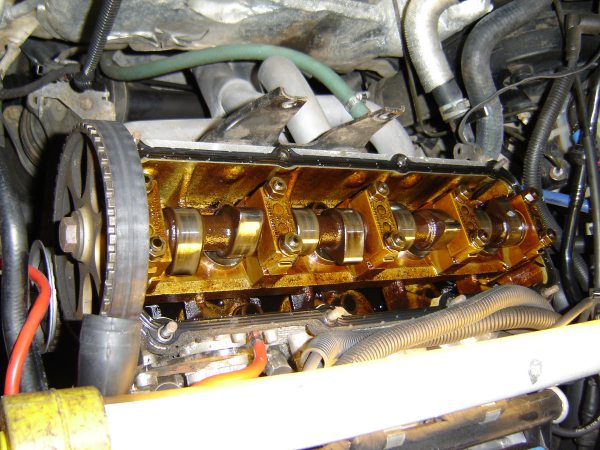
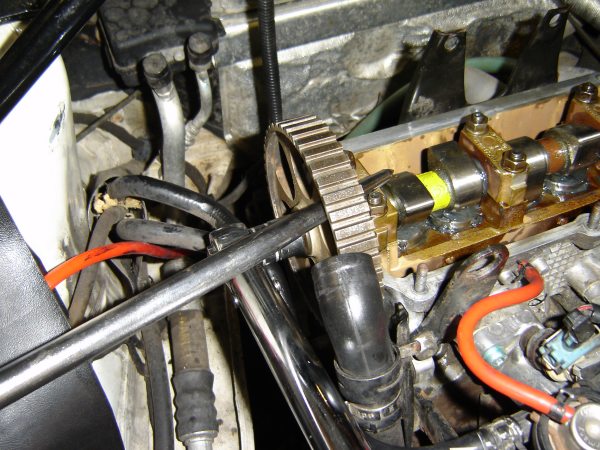
Here, we can see a little oil weepage from either the cam seal, or the valve cover..
Step 6 -
Remove the small 10mm nuts that hold the cam cover in place, here we see that two of the rear studs came out of the block, since the small nuts here are exposed to so much damn heat from my headers...Yea, I know people say a header on a ABA is a waste, but it came with the car.. and chicks dig it ok? I had to heat the nuts up in a vice to pull them off the studs.
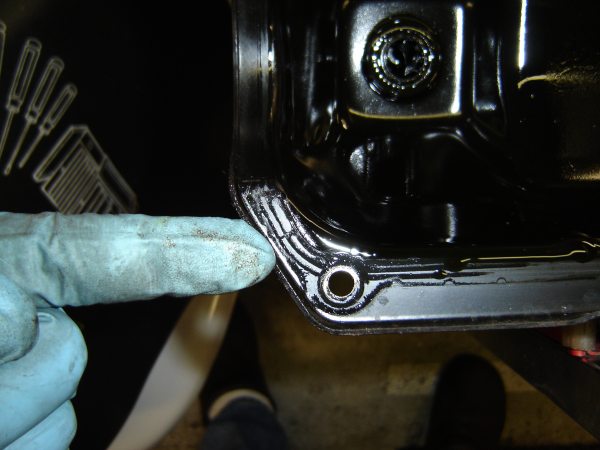
And with a good pair of eyes, I found this source of the leak, seems oil was weeping from the cam cover casket.
Step 7 -
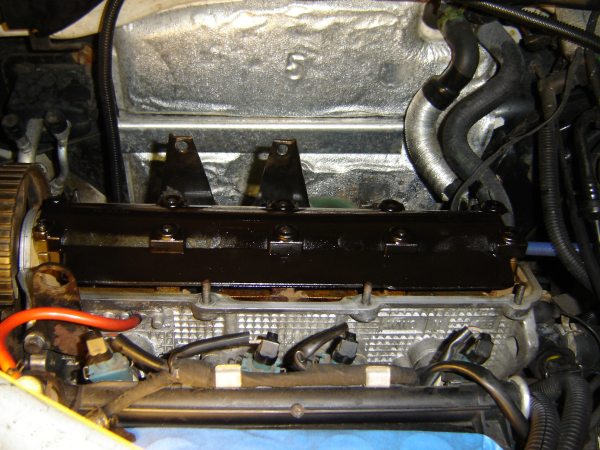
That black cover is the cam splash cover. It keeps oil on the cam VS the underside of the cam cover. Its not held down by anything, it just sits there, go ahead and pull it off..
See? It came right off.
Step 8 -
Using the spark plug boot pullers, carefully remove the spark plug boots/wires from all 4 plugs. Make sure the engine is COLD to prevent thread damage to the head. Use compressed air to blow out area around plug before removal, and if needed soak plugs with PB Blaster or CRC Power Lube to loosen them.
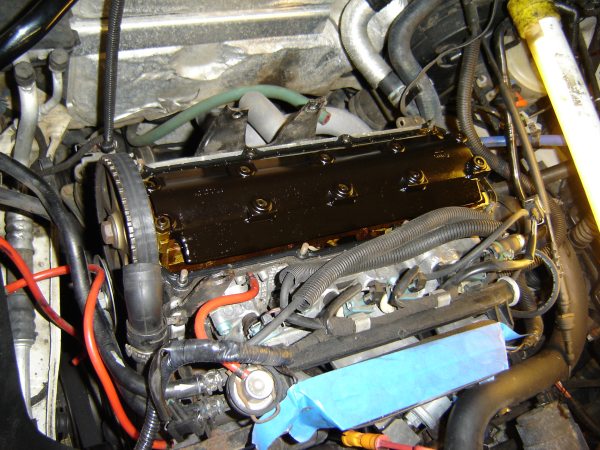
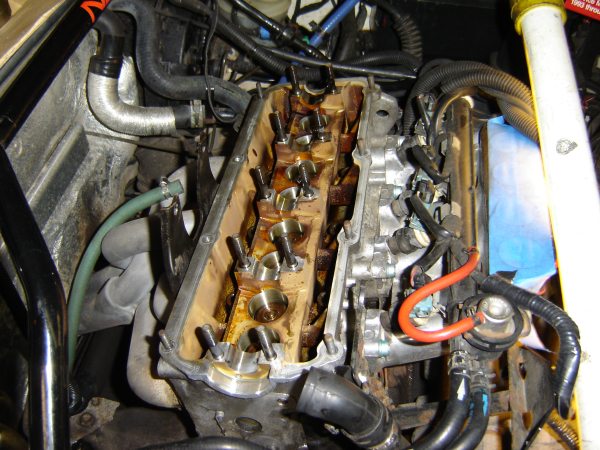
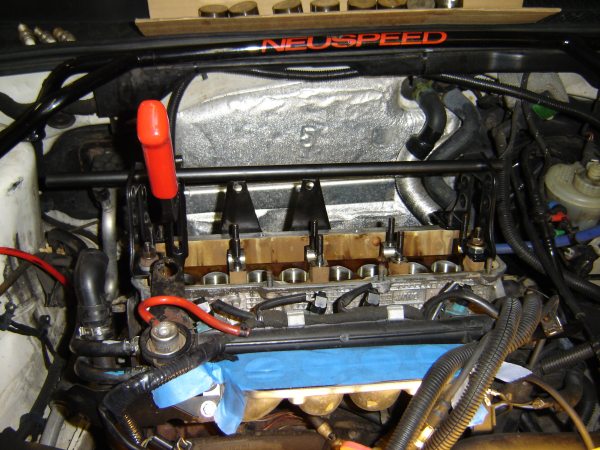
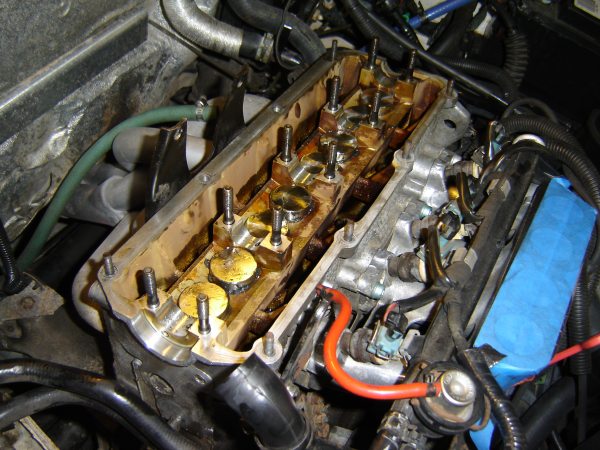
Step 9 -
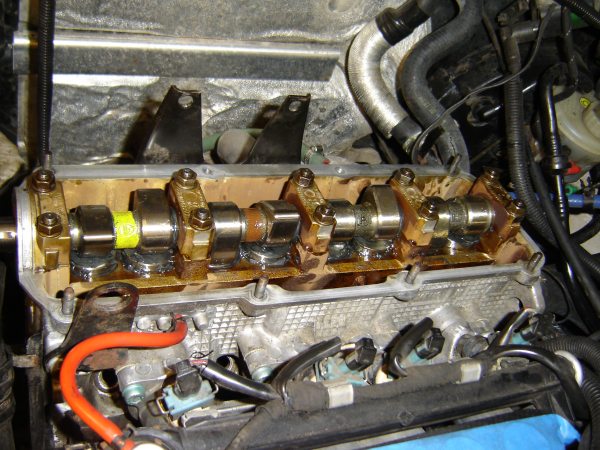
This is what everything should look like.
| Take this time NOW to
set the engine at TDC - this step is critical! And then REMOVE the timing belt. ONCE THE BELT IS REMOVED DO NOT ROTATE THE CAM OR CRANK! INTERNAL ENGINE CAN RESULT! |
Step 10 -
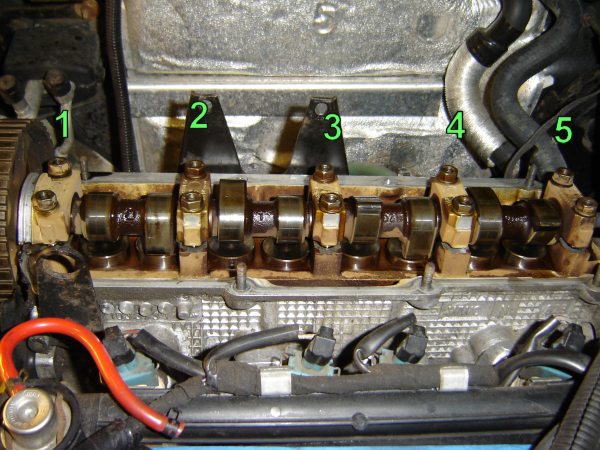
Carefully remove the caps - follow this sequence! Its critical!
| Never just "remove"
one cap at a time! Follow this sequence to relive spring pressure from
the valves slowly and evenly! Loosen caps 1, 3 and 5. Two turns for each nut, and then move on to the next cap in order!. Once 1, 3, and 5 are removed, do the same for 2 and 4. Alternate in an "x" pattern, turn each nut twice. If you have no idea what I mean, stop and ask someone. |
Step 11 -
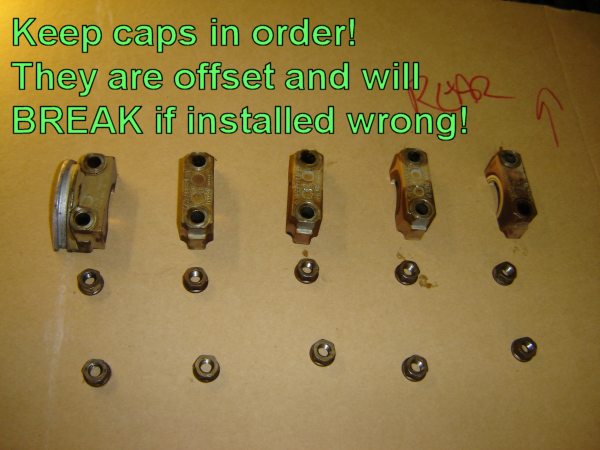
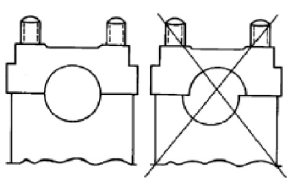
Keep the caps in order. They are offset, and will break if installed wrong, the nuts are just my way of keeping track of things, they don't have to go back in the same place.
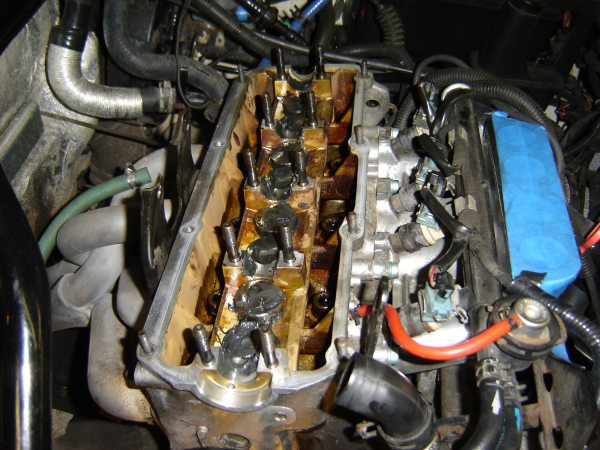
Step 12 -
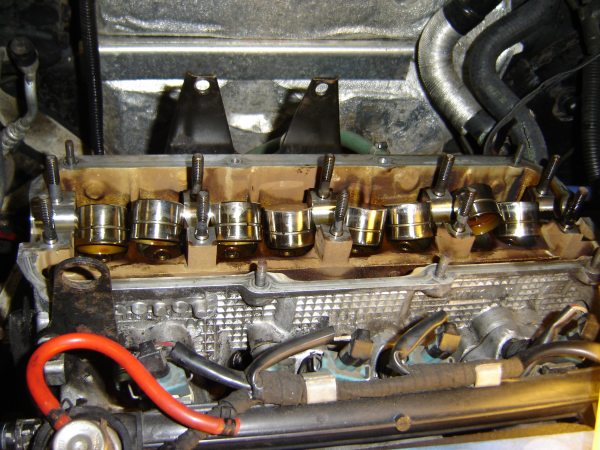
At this point take the cam out, and place it someplace safe and away from dirt/grit. Use a magnet, or your fingers and pull up on the lifters to remove them. I like to keep these in order as well... Inspect them for any funky wear patterns.
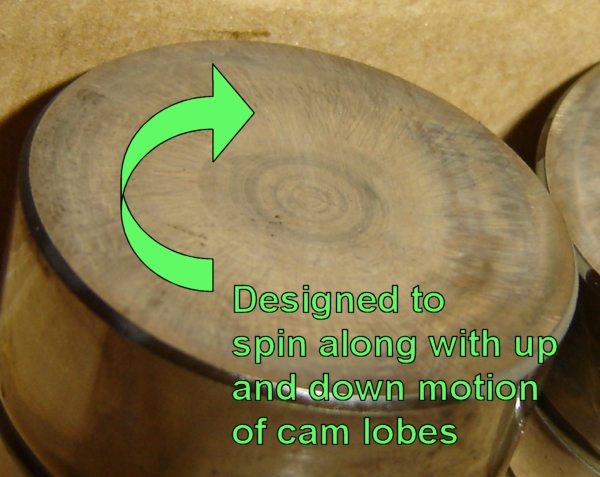
The lifters are designed to go up and down with valve. They act as an oil filled hydraulic cushion. They also rotate 360 degrees as they go up and down, see the swirl wear pattern? Its normal.
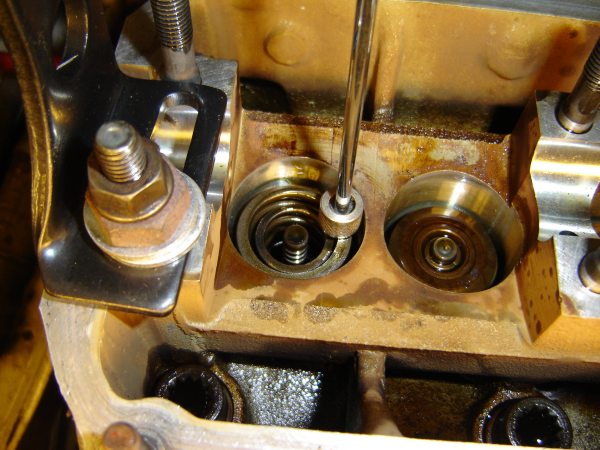
Lifters removed.
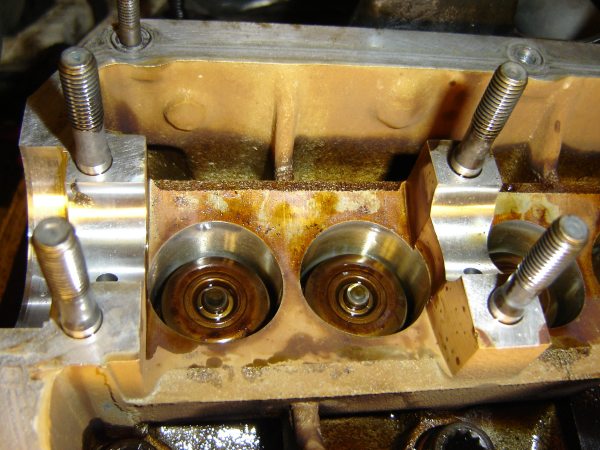
Close up of top of spring retainers, keepers, and lifter bores.
Take this time now to clean all the cam bearings, and valve cover sealing surfaces with some brake clean and a clean rag.
Step 13 -

Go mount that old cam, in a vice with some wood on either side of it, and break loose that son-of a bitch cam bolt at the end of the cam.
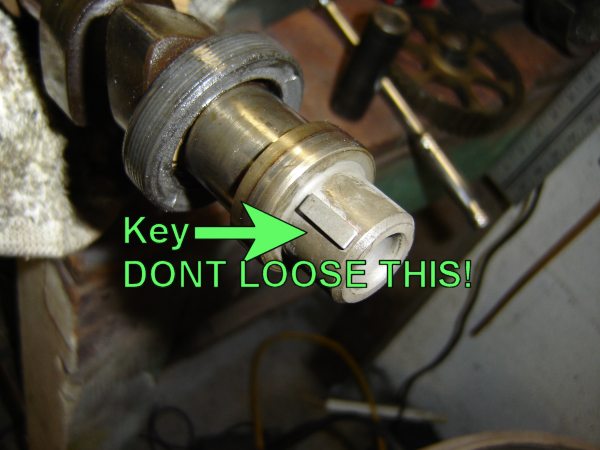
Note the key in the keyway!
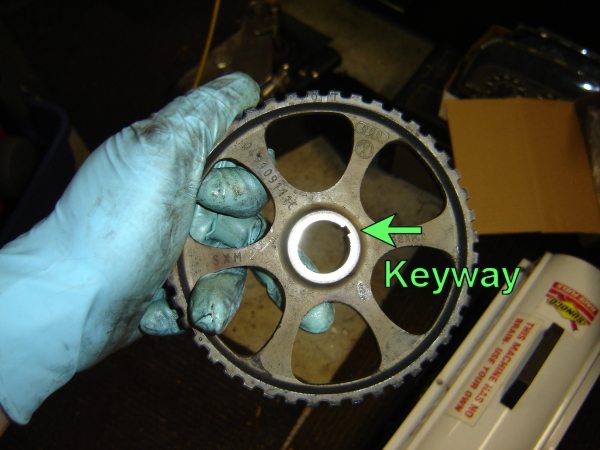
Set the key, sprocket, and bolt to the side.
Step 14 - NOTE IF YOU ARE SKIPPING SPRINGS, YOU CAN JUMP TO STEP 22
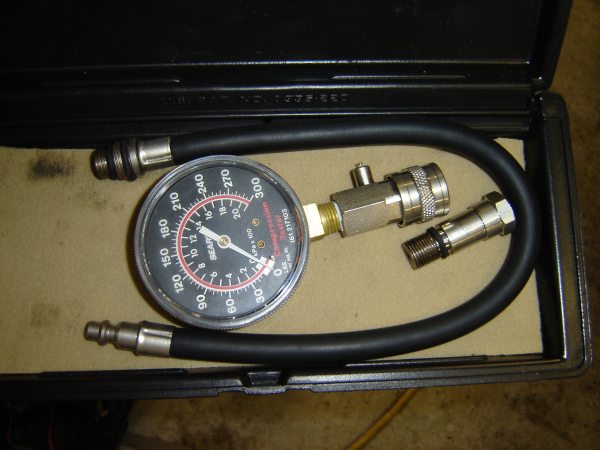
Take that compression tester, and remove the air valve at the base of it.

Use a tire valve stem tool to remove it. Don't throw it away, just put it away for now.
We are going to screw this into the spark plug thread, and blow compressed air into the cylinder to keep the valves from falling down into the engine when we remove the valve keepers. No air? No problem, see step 38 on this page.
Screw the air line into the number one cylinder, make sure the air pressure is at least 100 psi. Hook up the airline, and the engine may kick over. Its ok. Don't worry, since the valves are "up" they cant hit the head.
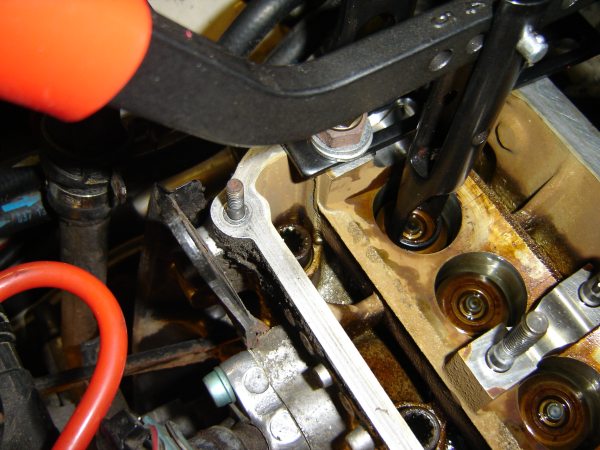
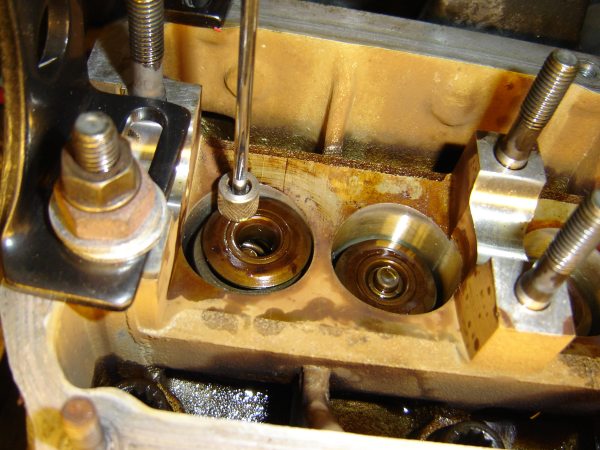
Step 15 -
Install the valve spring compressor tool as shown.
This dude made his own! Too
much work for me, but whatever!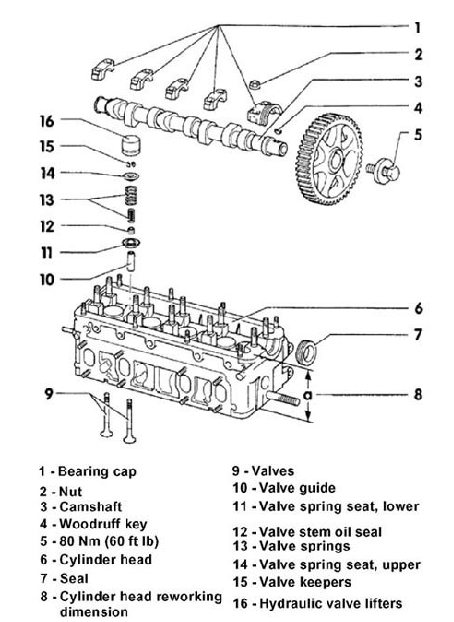
Position the tool so it compresses the spring retainer down. The idea is to keep the air pressure (or rope) to hold the valve "up", and press the springs down.
Then use a magnet to remove the keepers.
Note: If the valve opens, and the keepers are sticky, loosen them up by tapping on the head of the spring seat (retainer) with a deep socket (take care not to scratch lifter bores!) - (see step 20)
Step 16 -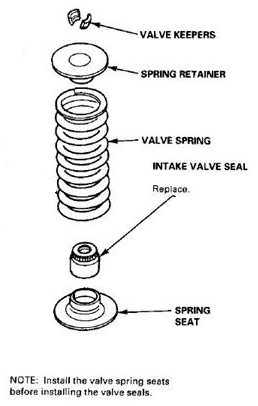
Use a magnet to lift out spring retainer.
And the springs;
Then use a the pair of open-end needle nose pliers to grab and remove the seal.
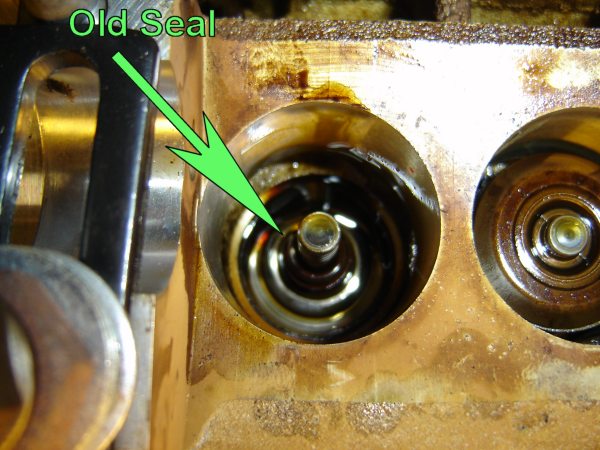
NOTE: MAKE SURE NOT TO SCRATCH THE LIFTER BORE OR VALVE STEM WITH THE PLIERS!
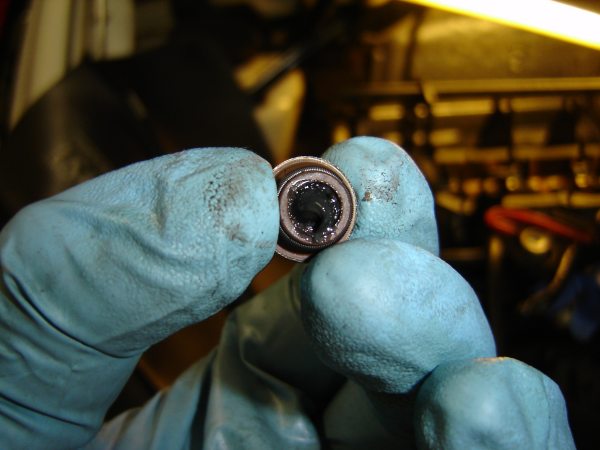
Step 17 -
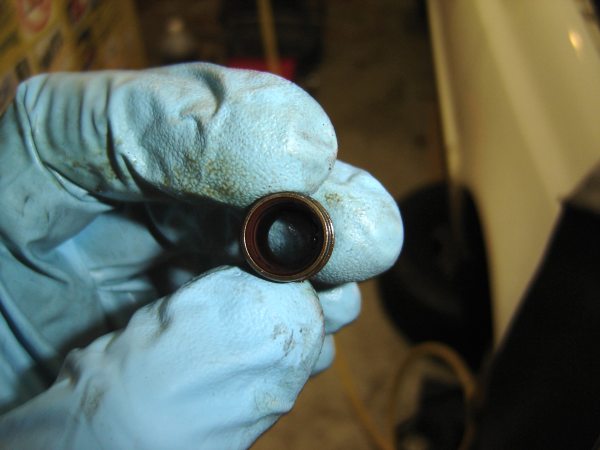
Old seal, its hard to see, but the inside is brittle and worn.
Step 18 -
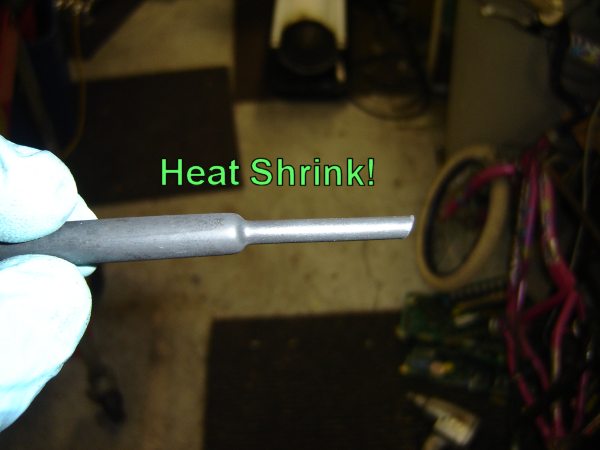
Its CRITICAL that the new seal NOT get cut as it slides over the valve stem keeper groves. To prevent damage I took a piece of heat shrink tubing and heated one end, and then the wide end can slip over the valve stem. It works PERFECT.
Step 19 -
I put a dab of engine assembly lube on the new seals. Most people use motor oil, that's ok too.
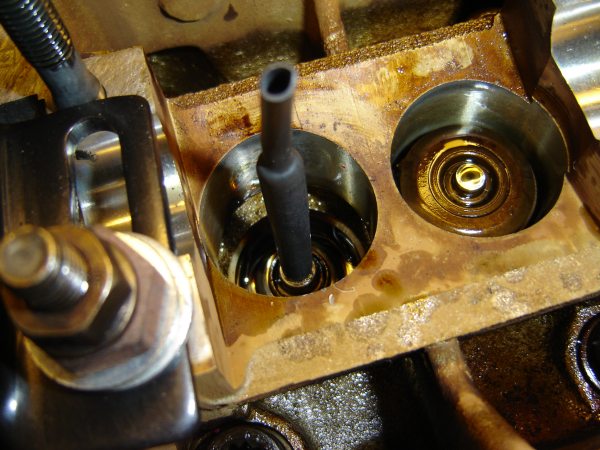
Then slide the new seal down onto the valve once its at the base, pull up the heat shrink tubing. Press the seal into place with a 11mm deep socket. Give it a very light tap with a rubber hammer to seat it.
Reinstall the springs, and spring hat (retainer) and keepers, place some engine assembly lube on the keepers to make them "stick" so they don't fall out when you try to install them. Its a pain, take your time.
Step 20 -
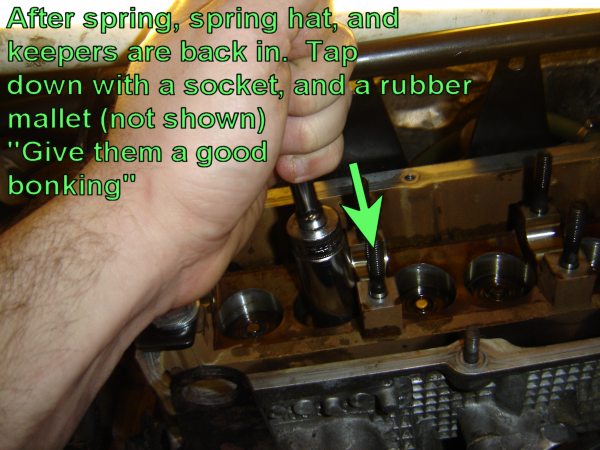
Do what the picture says.
Step 21 - Do each valve, one at a time; this takes some time.. (Steps 15 - 20)
Bonk, Compress, Pull Keepers, Spring hat (retainer), springs, valve seal, ** lube new seal, install new seal, install springs, install hat, install keepers.
** = Remove and install spring seats if OBDII car is going to use dual rate HD valve springs!
Step 22 -
Install the new lifters back into the bores. Add a healthy helping of engine assembly lube to all sides of them. Take care, they are a tight fit.. but should move freely in the bores... RESIST the temptation to tap on them with a soft tool.. Don't do it! Pop them back out, and try it again.. take your time.
Also lube the crap out of the cam journals.
Step 23 -
Install the cam. - Install the cam with the lobes for cylinder number 1 pointing "up".
Step 24 -
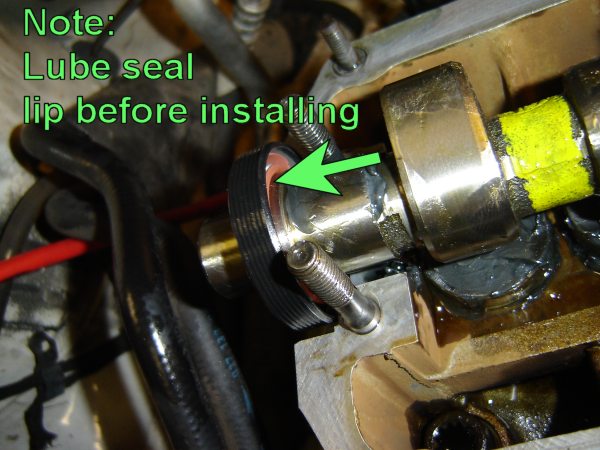
Install the new cam seal, lube up the seal area where it contacts the cam. This is critical.
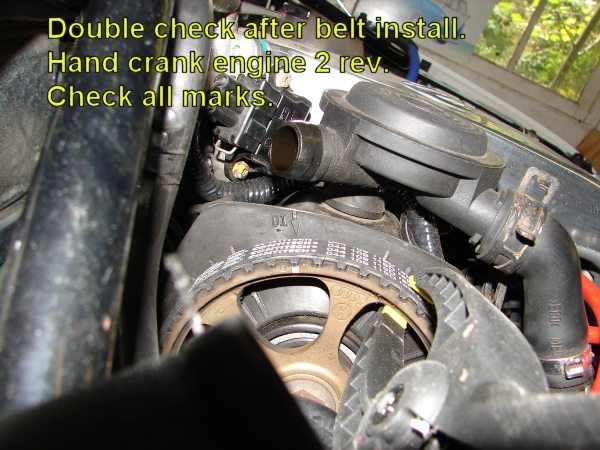
SET THE CRANK AND DISTRIBUTOR BACK TO TDC!
Step 25 -
Add LOTS of engine assembly lube to the cam journals.
MAKE SURE NUMBER ONE INTAKE AND EXHAUST LOBES ARE POINTED UP AS SHOWN!
Tighten down the bearing caps. Reverse the way you removed them. - two turns at a time.
Install caps 2 and 4 - the same way you removed them. "X" pattern. - two turns each.
Then install caps 1, 3, and 5. again in an alternating order, two turns each..
Turn each nut two times, and then move on.
Tighten all nuts to 7 ft lbs, and then a final 15 ft lbs. - again alternate the sequence.
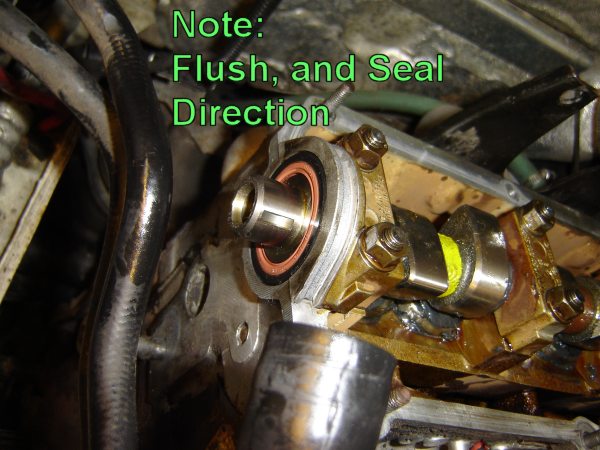
You want the cam seal to look like this:
Step 26 - (phew!)
Install the cam key, and gear, and torque the center cam bolt to 59 Ft Lbs. I used a breaker bar to hold the cam bear against the #1 bearing cap while I torqued it down.

Lube the crap out of the cam lobes, and pour oil (about 1/2 a qt) over the cam lobes and then coat them with engine assembly lube.

Step 27 -
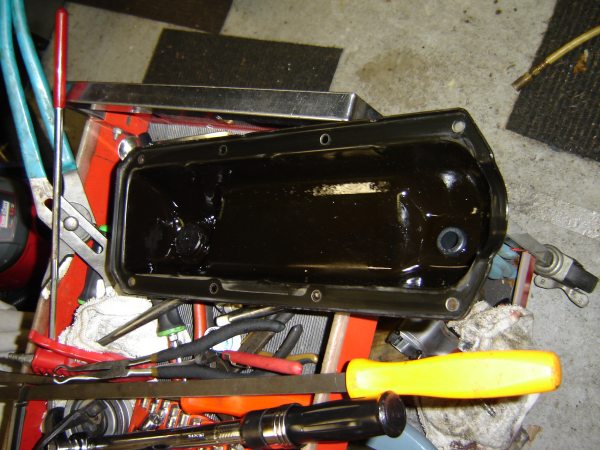
Place the cam splash tray and cover back onto the cam.
Step 28 -
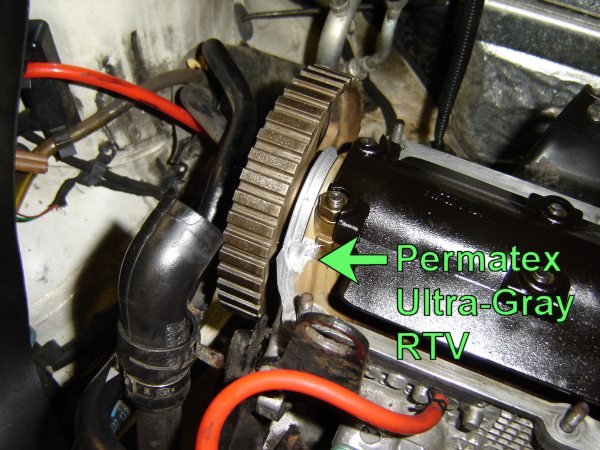
Add a dab of Permatex Ultra Gray RTV at each "arch corner" on the head where the valve cover gasket meets an arch (two on left, two on right) at the base of the semi-circle. VW does not say to do this, but I do... and I find it helps me sleep better at night.
Clean and wipe off the gasket sealing surfaces on the cam cover with brake clean and a rag. I also took this time to use a razor blade and cut out my old PCV breather grommet and install a new one. The breathers break easy, so be careful, this is why I used the blade to weaken the old grommet.
Tighten the valve cover down to 7 ft lbs. Again make sure you tighten in "steps" and in a criss-cross pattern.
Follow steps 15-23 back at the timing belt DIY.
Step 29 - Install the rest of the intake junk you took off. Tighten down the intake to 15 Ft lbs. Triple check that all the lines, wires, and do-dads are hooked up.
Step 30 - Start the floggin car! Hold the idle for 20 min @ 2000 RPM this is prime camshaft break in time.
| It is
important that the engine starts immediately. Prolonged cranking may damage the camshaft, lifters and/or followers. DO NOT let it idle. It is essential to run the engine at 1800-2200 RPM for at least 20 minutes. Because the camshaft and lifters are primarily lubricated by the splash of oil from the crankshaft, any RPM below 1,800 may result in insufficient lubrication and may cause cam lobe failure. The high RPM also allows the lifters to rotate quicker and seat properly to the camshaft during this critical break-in procedure. During the first 20 minutes, carefully monitor oil pressure, if any problems arise, shut down the engine immediately. |
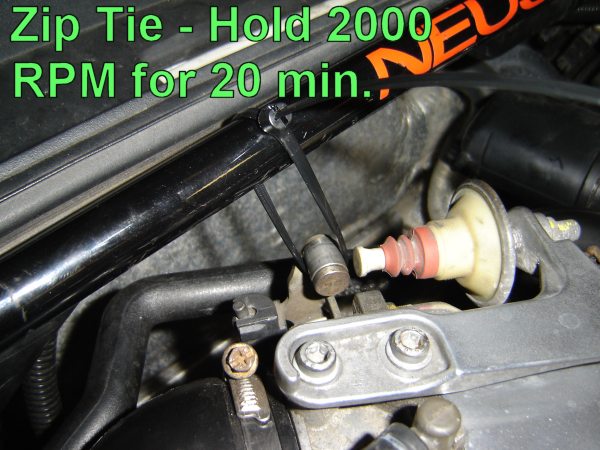
I used a zip tie while I cleaned up to hold the engine RPMs.
Note: ITS NORMAL to hear some lifter chatter, or cam chatter "click, click, click" on and off while the engine runs at this time. The lifters need to pump up with oil. Over the twenty min run, my car made all sorts of ugly valve train sounds (mainly clicking and chatter)
(this is an example of what I mean) (windows.wav file) - Note this is at idle, not 2000 RPM.
After I went for a drive, I was pleased with the power band of this cam. The stock cam made power at 3-4000 RPM, and then took a dump after 5Gs. This cam, starts to pull at 2500 RPM, and just.. keeps... going! I instantly saw a smile on my face in the rear view mirror as I went down to the main street and did some pulls, it was like a cup of coffee for my 2.0 slow. I had some lifter noise, but after a few 5G pulls they got full and quieted down to stock levels (meaning they made no noise..)
Here's a movie of the finished results @ 2500 RPM.. nice and quiet! :)
