Seat Track Guide Repair - Or How To Stop A
Wobbly Seat.
Ah, yes, the thrifty MKIII line. Made up of choice
left over MKII parts... Which was made up from left over MKI parts... designed
in 1973... Like... the seat guide design. Sure, it looks great on paper,
but in real life, 100,000 miles later, and 20 bazillion times of you and
everyone else moving the seat... falling french fries, dimes, and so on.. it
starts to wear out. And before you know it, its like a bad sicko twisted
hobby horse ride of doom.
So lets get started... shall we...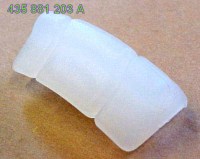
You'll need:
Some rags
Old ass nasty beach towel
Vacuum cleaner
This Kit from ESC Tuning, or
Concept 1
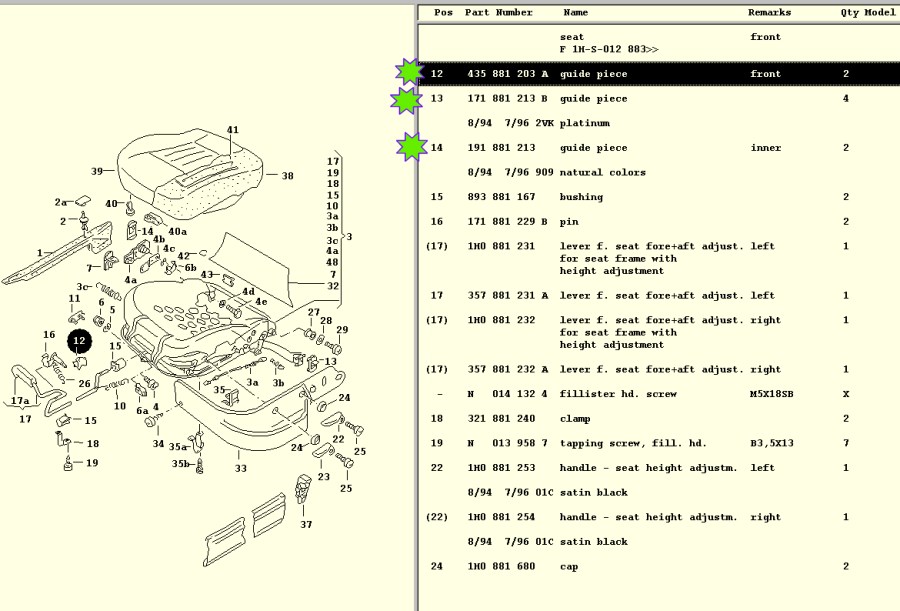
or a trip to the dealer: and ask for these parts, each front seat gets
one of these pieces:
#12 - 435 881 203 A Guide Piece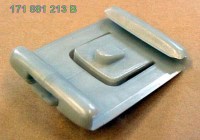
#13 - 171 881 213 B Guide Piece
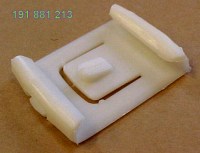
#14 - 191 881 213 Guide Piece
Silicone based lubricant, I use
Sil-gylide
A 6mm allen key, and 10mm socket, or a pair of needle nose pliers.
A flathead screwdriver
An hour or so, less if its just 1 seat.
Good clean work surface for the seats to chill on.
 |
If your car is a 1999 or later car ( a MK 3.5) make
sure your battery is disconnected before you remove the seats! Your seats
have side impact thorax airbags in them.. They will set an airbag code if you
unplug them with the battery hooked up! Make sure the seats are safely
back in the car and plugged in before you reinstall the battery. If you
are unable to disconnect the airbag wire from the seat, do not cut, alter or
attempt to repair this wire! Personal damage or injury can result!
Step 1 - Open the door, and look at the front of
the seat, push it all the way to the back of the car...
You'll see a thing that looks like this... this is the
OBD1 style seat retainer. This style just gets squeezed to push it out of
its little tang. OBDII cars use a 6mm Allen head bolt and a 10mm nut.
On the drivers side, reach under
the seat and unhook the seatbelt warning wire. Feel free never to hook it
up again....
Step 2 - Remove the rear seat track covers.
These just pop off by hand. Wash them off with soapy water.. I am sure
they are very nasty.
Step 3 - Place towels in back seat area behind seat
track guides. This is to keep grease off the carpet. Its nasty.
Slide the seat to the rear of the car, lift up on the seat
adjuster, and push the seat all the way back to the rear of the car.
On a Jetta or 4 door Golf this is best done from the back
door. On a GTI its best done from the front seat. Two people might
be helpful. If you have a Jetta Coupe, you are a moron. You made
that car, and your reading this? WTF?!
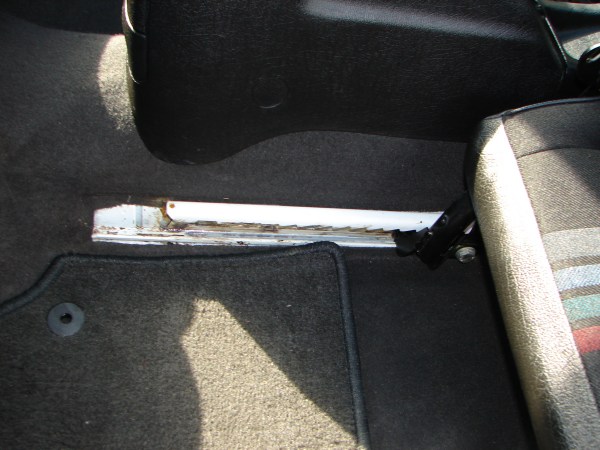
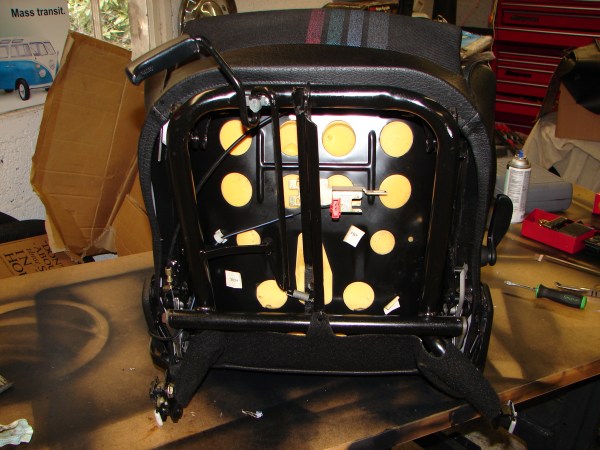
You should have the seat out of the car, the tracks
exposed, and the front guide exposed.

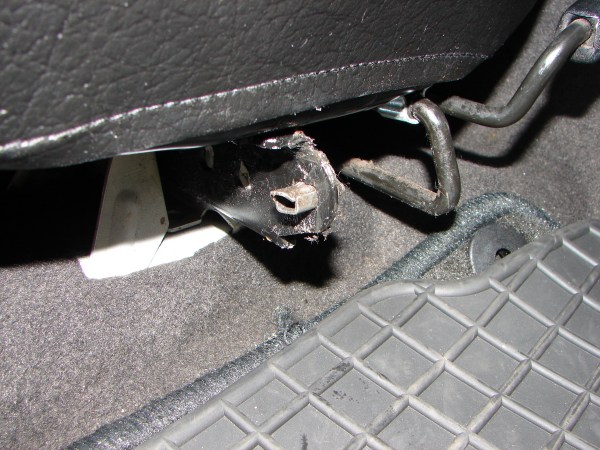
Damn, that's nasty. That seat guide, the nylon part
just comes with a little pry from a screwdriver.
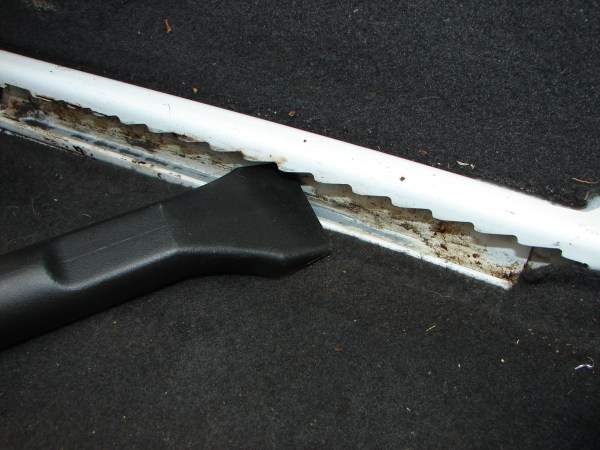
Step 4 - Vacuum out the crud. Wipe out the
seat guide rails.
Now is a great time to really clean your carpet and center
console too...
Step 5 - Walk the seat over to your sturdy work
surface. Mine is an old door on two saw horses. Rock solid!

Step 6 - Match up ole' nasty with the new kid on
the block.
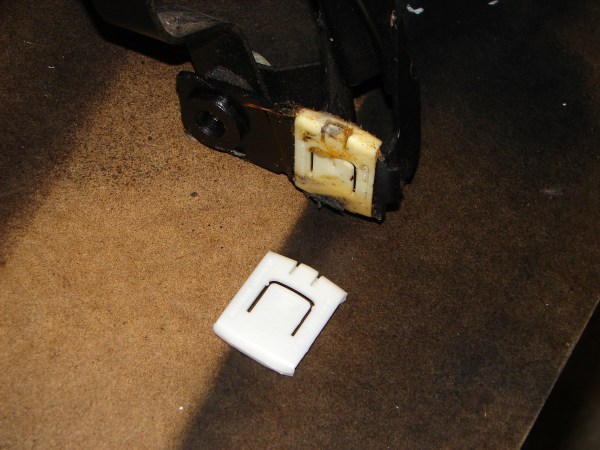
Step 7 - Pop the old one off.

Yikes!
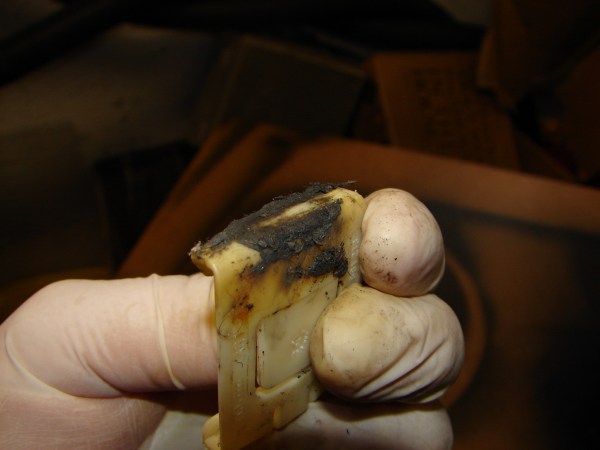
Not only is it nasty. Its also worn down quite a
bit. I have seen these where they are worn all the way down to bear metal.
Do this for the other side... and don't mix them up!
Install your new parts on the seat.
Step 8 - Clean up what's ever is down there..
See that red thing in the middle? That's the seat
belt warning. Cabrio owners with airbags have a larger yellow plug down
there.. Lube the center track a little, a thin film is all that is needed.
Step 9 - Put it back in the car, carefully.
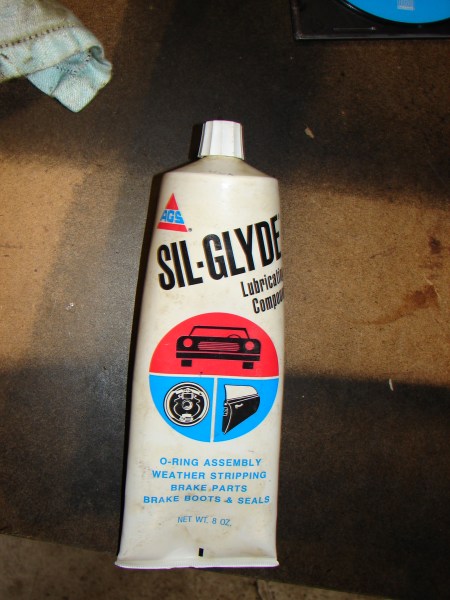
Use your plastic safe silicone based grease to lube the
tracks and guides. A small bit goes a long way.
Test out the seat sliders... should feel like a new car
again! Enjoy!
Home