Fixing Leaks Under The Raintray (cowl)
or Where is my ECU, Alarm horn, and Wipers?
Ahh, yes, what's down there... how do I get in there, and why would I want to
get in there?
Just to be clear, "cowl", "raintray", and "water
deflector" are all the same part here...
Well, its pretty simple, there are a few things in there
you may need to get to for one reason or another. The ECU (Computer) is
under the raintray, so if you need to swap a chip or check wires, you need to
get there. The wiper assembly is under there. The alarm horn is
tucked in there, as well as the fresh air inlet for the passenger compartment.
I'll show you how to add a simple and cheap way to add a cabin filter as well.
Leaves and debris (dirt) can wind up down there and cause a backup in the system
and cause a small water leak as well. I also had a damaged raintray seal
on the drivers side, this was my main reason for going in there.... If you
have a 2.0 you need to pull off the drivers side to get to the coil. If
the water leak is on the passenger floor only, also
look here.
ECU - Passenger only
Wipers/Motor - Both sides come off
A/C Ambient Temp
switch - Both sides come off.
Coil (2.0) - Both sides come off
Cabin Air Filter - Passenger only
Alarm Horn - Both sides come off
The MKIII model line *never came* with a factory cabin
filter.
| Time: a few
hours (mosty to let stuff dry), on a dry, sunny warm day (or in a garage).
Tools you'll need:
A small flat screwdriver
Battery terminal puller
A 10, 13, and 15mm sockets on a 3/8" ratchet
A trim panel tool to remove the push pins
Magnet on a stick
A wet/dry vac
Consumables you'll want:
A chunk of heater filter
Spray paint
Body Seam Sealer (DO NOT USE HOUSE CAULK!!!)
Soapy water and a sponge
Rubber Disposable Gloves
OEM or aftermarket plug caps. (see part sheet) (5 of "C", 2 of "B")
Water Deflectors/Raintrays
|
Step 1
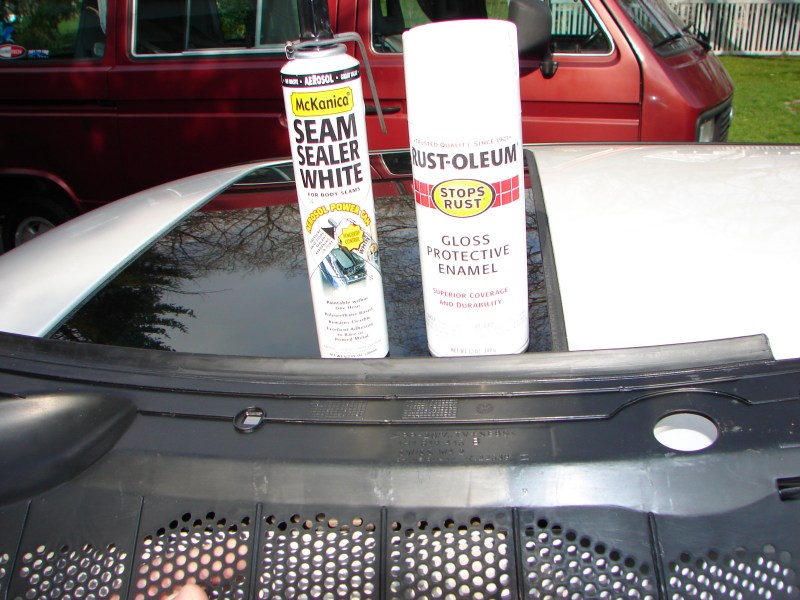
Get your goodies together. Here we see some
McKanica seam sealer,
Quality enamel paint, and a new Swiss made raintray for the drivers side to
repalce the damaged seal on mine. I got this part from
ECS tuning for about $50. They are
more at the dealer. The OEM ones were made in Germany, they sucked, the
rubber broke down and fell off. The new Swiss OEM ones hold up much
better. I only had to do the drivers side since my passenger side one was
already replaced with a Swiss unit.
Step 2
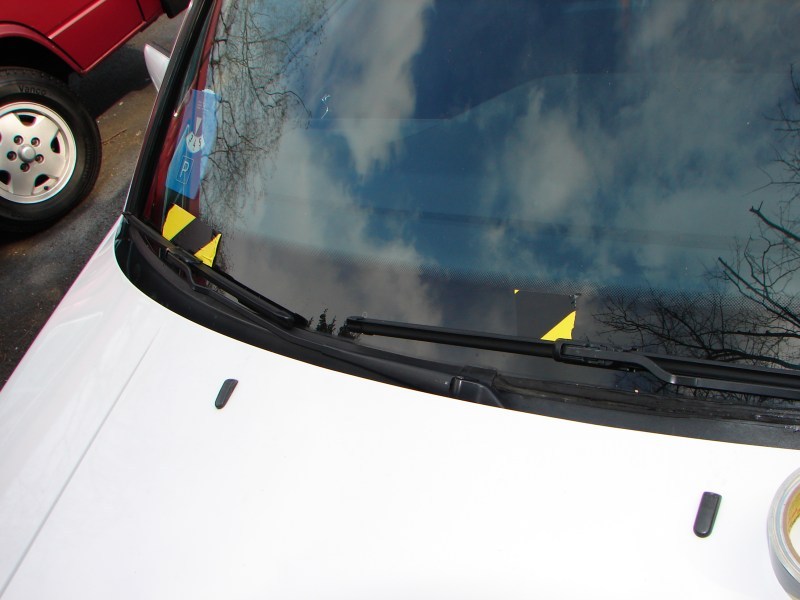
Before you start, its critical to mark where the wipers
lay against the windshield. Here I used some fancy tape I had. Make
sure you don't get them mixed up, left v.s. right.
Step 3 -
Open the hood and pop off the small covers on top of the
wiper arms. Try not to loose these.
Step 4 -
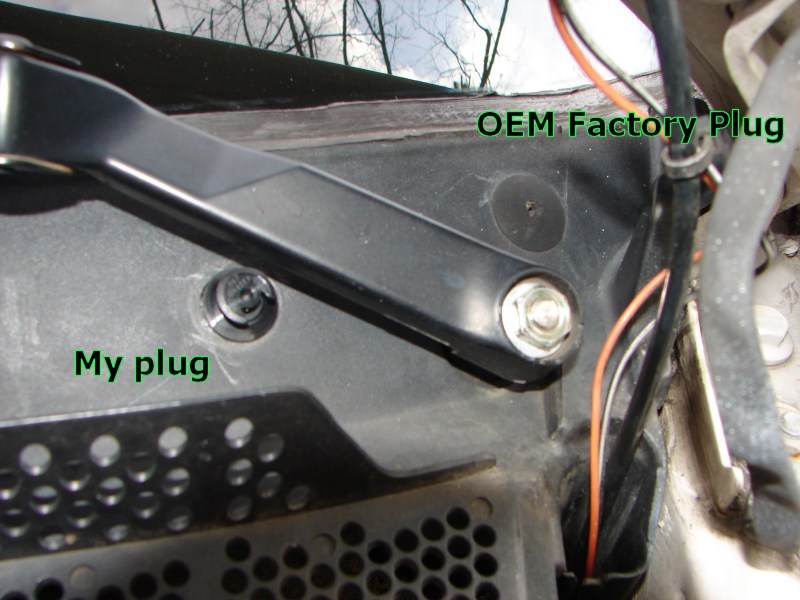
Here we see the OE plug VS some other plugs I had from
before. Expect the OE plugs to fight the whole way out. You might
want to have some on hand, or some aftermarket jobs to hold things in place once
it goes back together. Note how the heated washer jet wires, and washer
line runs along the side of the tray.
Undo the nuts and washers on both wiper arms. Use
your magnet on a stick to fish the washers out. Don't loose them!
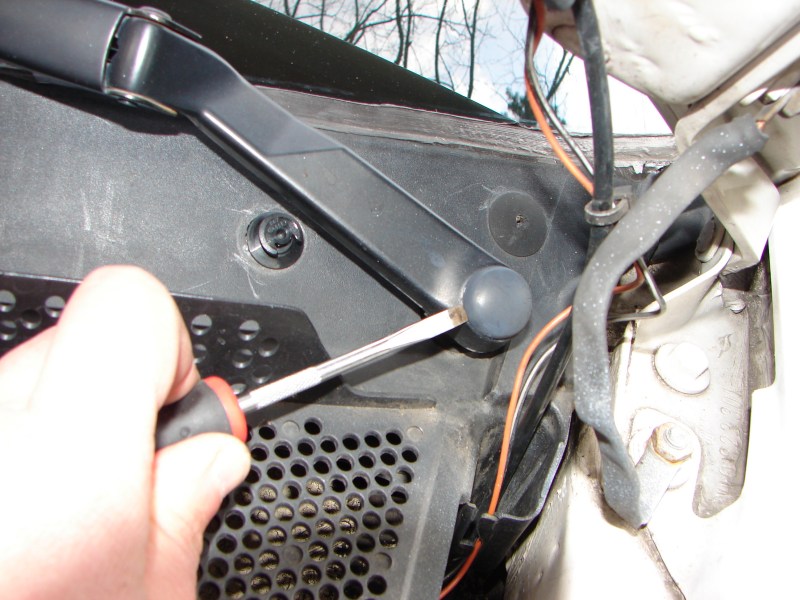
Step 5 -
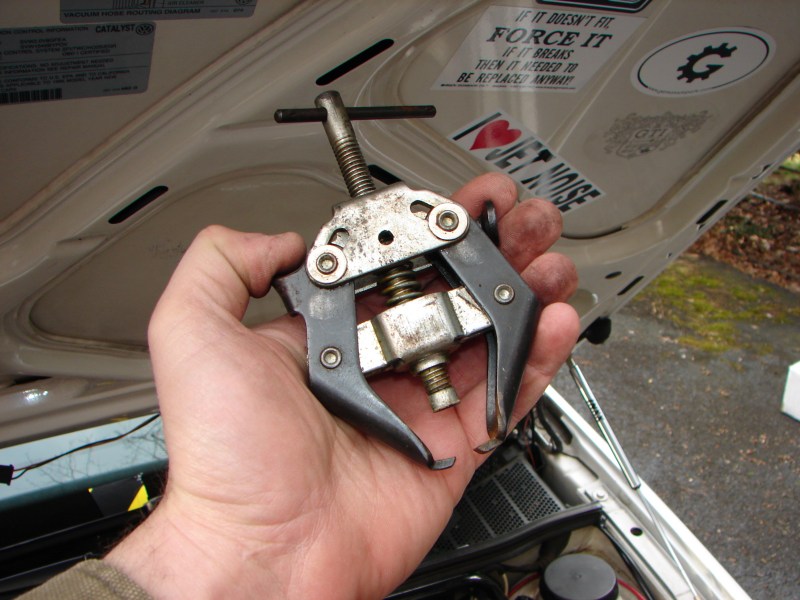
This is a battery terminal puller. They run $8 at
Sears. Its more or less a small gear puller and very handy for pulling
wiper arms off.

With the nuts removed -
Install the battery terminal puller over the wiper arm stud and crank it down.
Make sure the legs are under the wiper arm. It should pop right off.
Remove BOTH wiper arms.
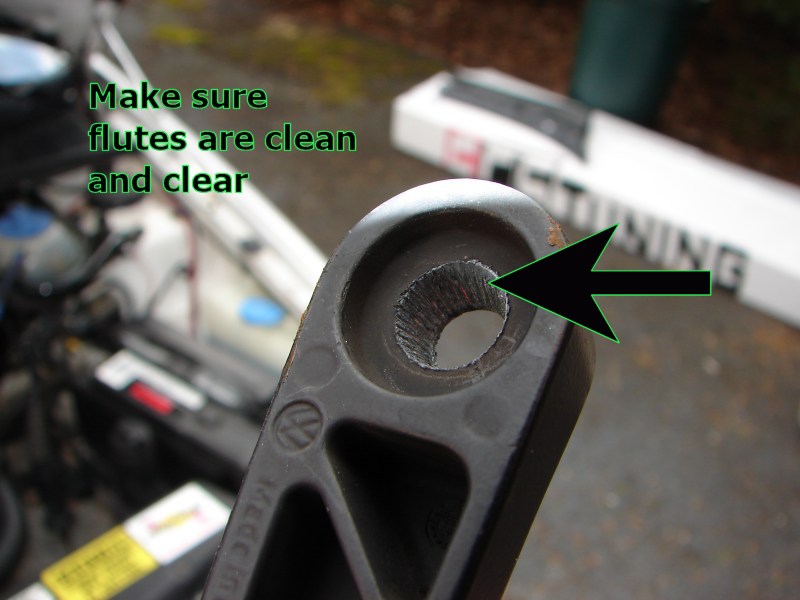
With the arms now off, inspect the small flutes and if
needed clean them out with a small pick.
Step 6
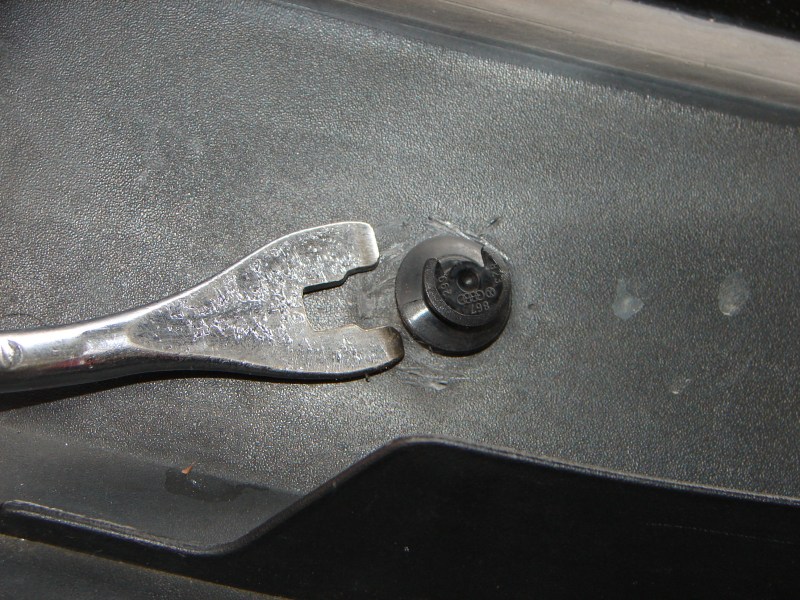
Use your trim popper to slide under the OE or aftermarket
plugs/pins and pry them out. The OE units need to be unscrewed as they
lifted. Expect them to strip out. This is why its a good idea to
have new ones on hand.
Step 7
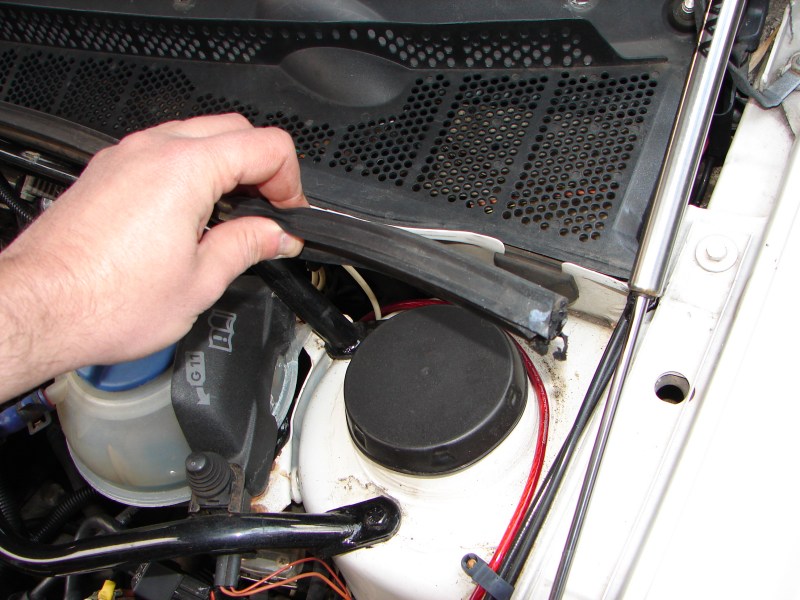
Once the plugs are *all* out of both sides, carefully
remove the rubber seal. This is just a pinch seal and it should come off
with no issues.
Step 8 -
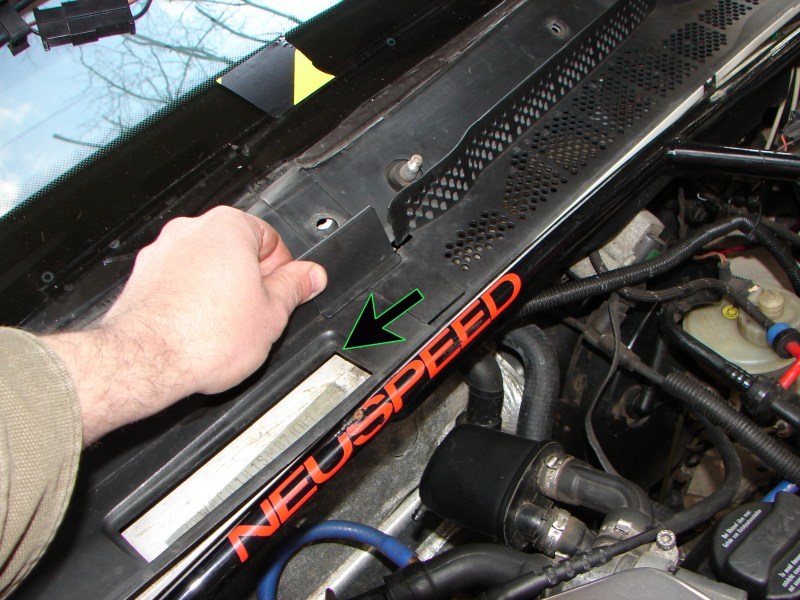
Side the center section between the two cowls to the
passenger side. Hey, look, its the VIN!
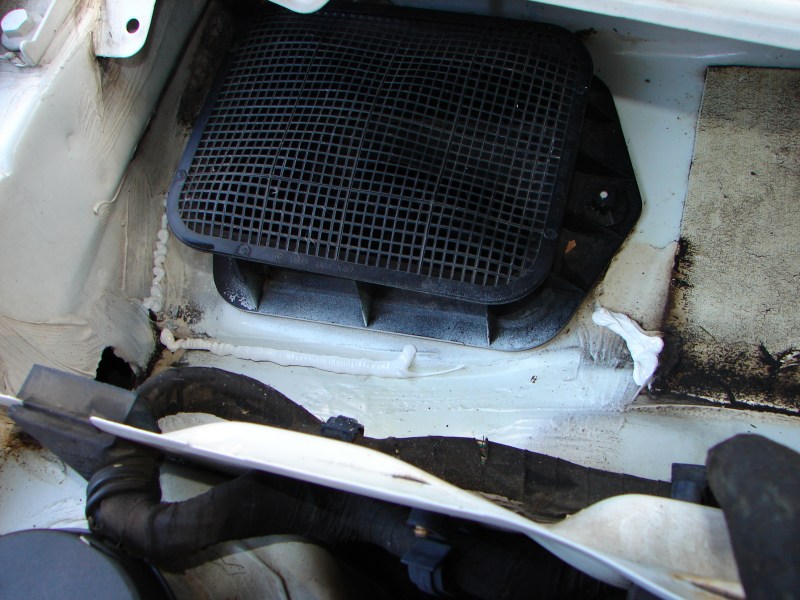
Step 9 -
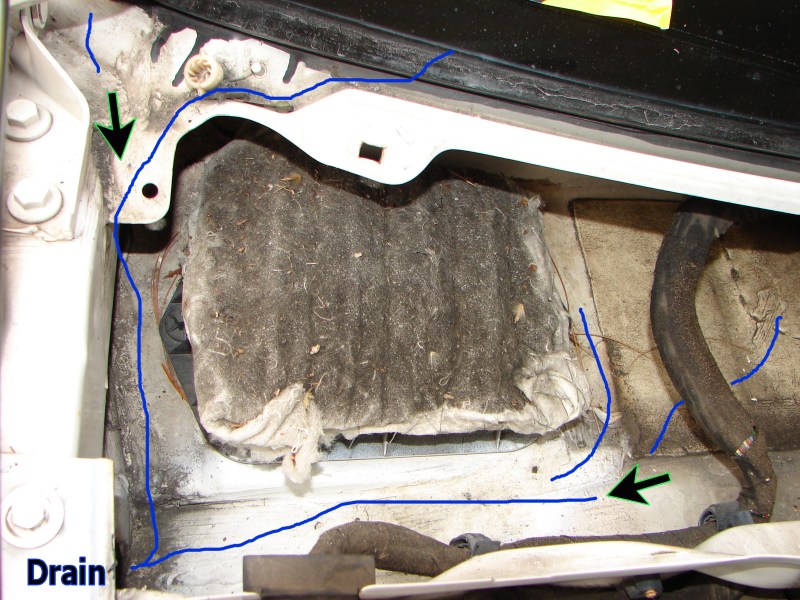
Carefully remove the passenger side cowl 1st. Here
we see the crap that was on my filter after 1 year of use. This is the
fresh air inlet.
The blue lines give you an idea of how the dirt and water
flows out to the drain on the side of the cowl.
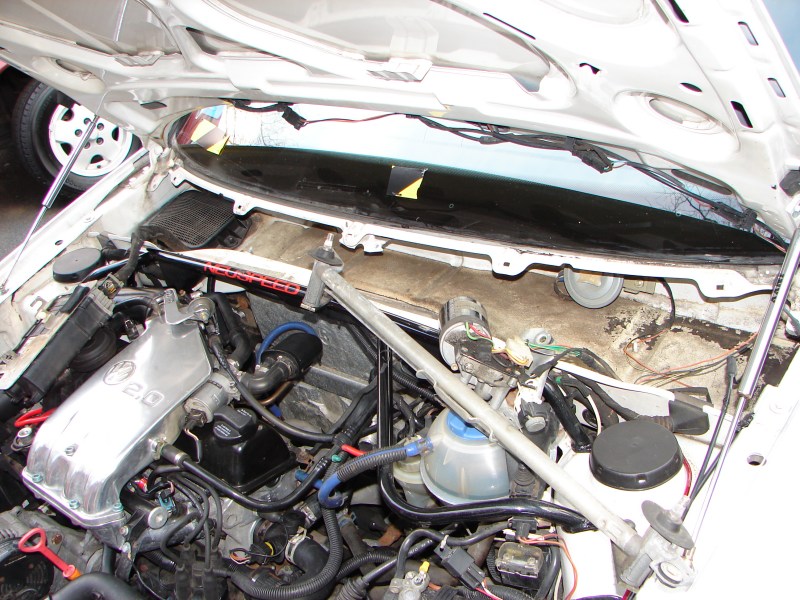
Step 10.
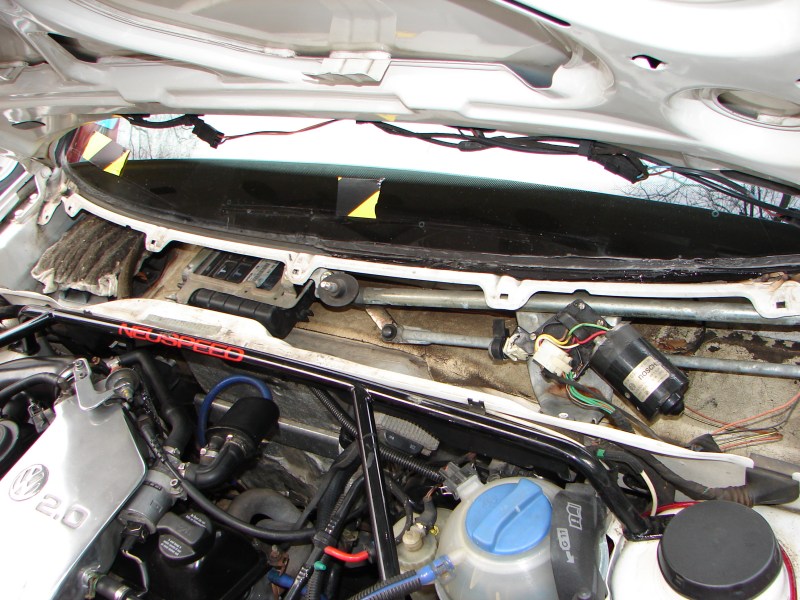
Next remove the drivers side cowl.
From the left to the right: Fresh air inlet, ECU, and
Wiper Assembly. The alarm horn is behind the wiper assembly.
Step 11 -

Here we see where my leak was. The factory seam
sealer used (now 13 years old!!) has cracked around the base of the hood
release. The arrow is pointing to a chunk of it.
Remove and unbolt the wiper assembly (3 bolts) and ECU (2
bolts). You can now see the alarm horn on the drivers side (the round gray
thing).
I also removed my dirty air filter. No need to
unplug wires. You can carefully rest the ECU and wipers on the engine bay.
See how dirty it is in there? Vacuum it out to get
out all the leaves and trash. Wash it with soap and water (Car wash soap),
and then dry it, air dry it well. You may also want to give the windshield
a good washing as well since you have this lower part off.
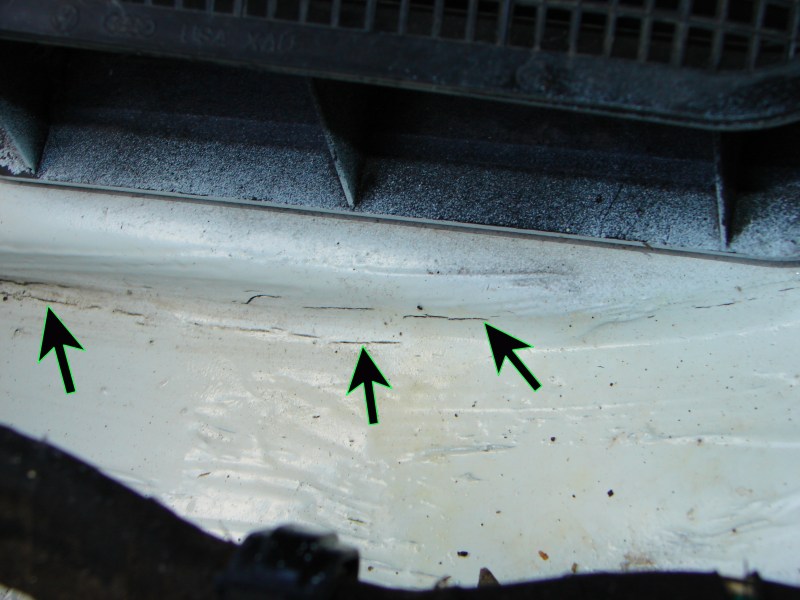
Now, near the factory seam sealer, we can see some small
cracks. This is not good. If you don't understand why, go
check out my Vanagon.
What can and will happen is over time, this can
freeze/thaw, get worse, cause rust, and leaks, and before you know it, its
raining on your feet.
Step 12 -
Reading the directions on the can of seam sealer, and
wearing gloves apply a small bead of seam sealer to the areas where you see
cracks. The point is to just fill in the damaged areas. Do not make
things worse by blocking or impeding the progress of water down to the factory
cowl hole. Your new seam sealer must be 100% smooth and clean.
Otherwise its not going to stick and make things worse. Smooth it out with
your glove.
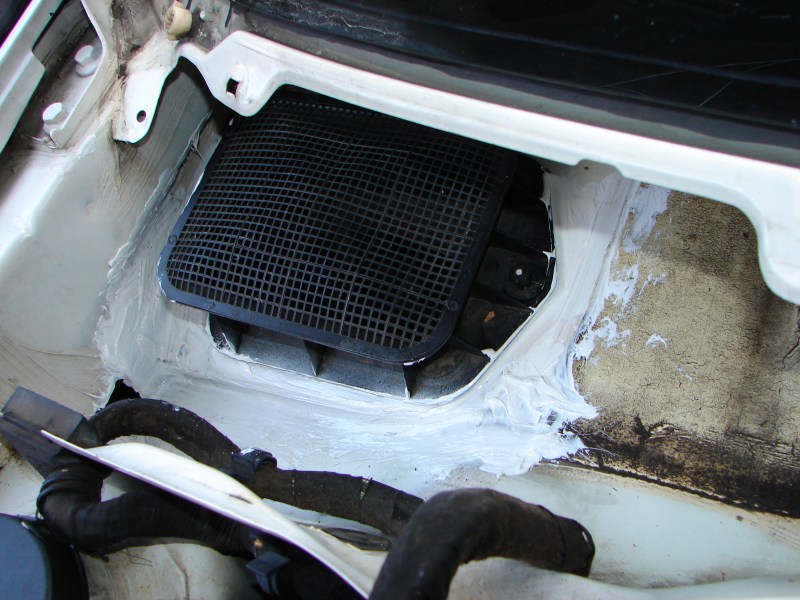
Ahhh, nice and smooth.
Wait 1 hour and then cover it with paint. Mask
off things well. Try not to spray the fresh air inlet. Beware!
For about a week, your car is gonna stink like plastic and paint if you use your
vent in the fresh air position. Drive with it in recalculate mode to
prevent this smell unit everything cures.
Step 13 -
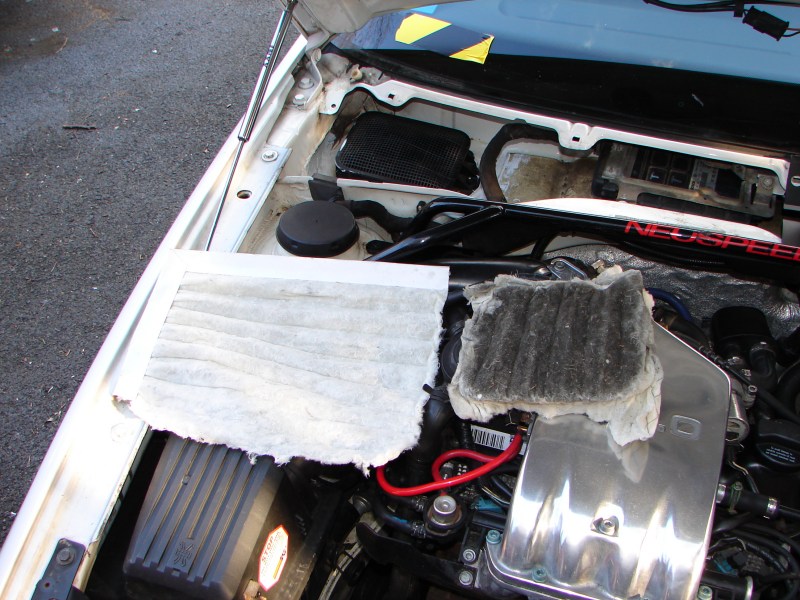
Cut out a new chunk of filter and then clamp/crimp it over
the fresh air inlet. Here we see new stuff, vs the crap the built up in 1
year! This is a cheap mod that is very sweet. Keep pollen out of the
car, vents, dust, smoke. It really works well. Most home centers
carry a filter sheet for less then $10 and you can make about 4 cabin filters
out of 1 full sheet. I used tin snips to cut the filter media. Get
the kind shown here, with the metal reinforcing. You can crimp the metal
over the factory fresh air inlet to make a good seal. The air still comes
in the car at the same speeds, and your now breathing cleaner air.
Install everything back the way you took it off.
Make sure you route the wires for everything back right, and there is a small
white clip on the cowl that the ECU slides in. Make sure its in there, its
hard to see.
Carefully line up the old wiper arms to your tape marks.
Make sure the flutes are locked into the wiper arm studs. Wiggle them if
needed.
Torque the wiper arm nuts to 15 ft lbs. All the
other bolts you took off, just snug them down.
Home