2.0 ABA Oil Cooler Gasket/Seal Replacement. or
How a $2.00 part can make you feel like a king...
This "how to" assumes you have some
basic tools, and safety gear. Safety glasses should be worn at all times when
working with tools and automotive fluids. Always use a hydraulic jack and safety
stands when lifting or getting under a vehicle. If you are unsure on where to
safety lift your vehicle, refer to its owners guide. The writer of this
how to assumes zero liability in how to use this guide, or any damages that may
come from it to you, your property, or others and others property. If you are
uncertain at any point, refer to a qualified automotive technician.
Oil leaks, seals or gaskets - often contour up high dollar
repairs that involve a huge mess like removing the engine or transmission to
fix. Thankfully the ABA is not a big oil leaker (unless you drive low, as
you should, and scrape holes into the oil pan), but there is one major
seal/gasket that fails and makes a huge mess - and if ignored will cause engine
damage.
 A
seal, is a device used to keep oil on one side, and dirt on the other, so a
crankshaft - has a front main and a real main seal.
The crank spins, and the seal allows the crank to spin, keeping oil inside the
engine. A gasket does the same job - only a gasket does not have any
moving parts - the gasket takes up the space between two parts - and fills in
"the gap" that would occur if the two parts were not a *perfect* match.
A
seal, is a device used to keep oil on one side, and dirt on the other, so a
crankshaft - has a front main and a real main seal.
The crank spins, and the seal allows the crank to spin, keeping oil inside the
engine. A gasket does the same job - only a gasket does not have any
moving parts - the gasket takes up the space between two parts - and fills in
"the gap" that would occur if the two parts were not a *perfect* match.
So really, this part that fails is a gasket - but its
round and flexible so it gets called a "seal". I'm going to refer to it as
a "cooler seal" from here on out. Hopefully me fellow automotive
word
Nazis will approve - but *technically* its a gasket. Ok, enough of the
semantics.
So, VW in the MKIII model line decided to give the engine
something a lot of other cars in its price range never had - a liquid cooled -
oil cooler. Oil gets hot - problem is, under hard driving, it can get *too
hot* and cause a premature breakdown of the oil's properties. VWs fix for
this was to install a device that allowed the oil to pass through a
mini-radiator that was part of the cooling system (engine coolant). Now I
know what your thinking, coolant (engine) is hot, 190 deg F. Well, under
hard.. hard driving oil temps can push up to 250 deg F. Do the math, pass
hot oil into an area where it comes in "thermal" contact with the cooler coolant
- and you can shave 60 degrees off your oil temperature. On the picture
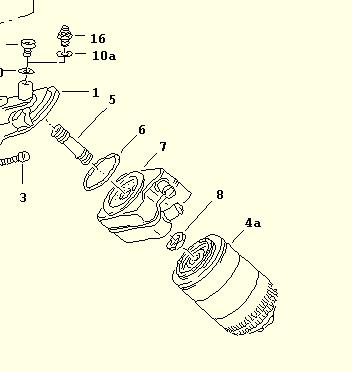
to the right, you are looking at part 6. That's the seal we replace.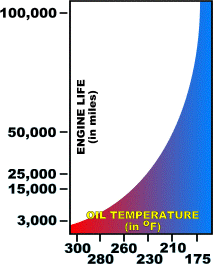
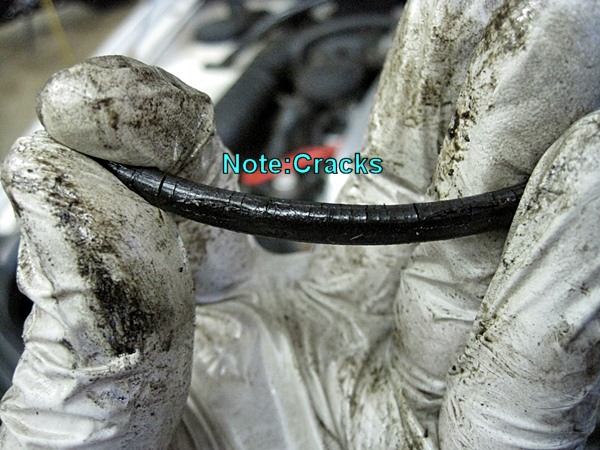
Oil
leaks are just nasty - oil when in contact with rubber coolant hoses breaks them
down it also leaves stains on the driveway, and stinks up my drinking water.
Ok - so what's the problem? Well, the problem is the
seal - that is "rubber" and sits between the engine block's mounting flange, and
then the oil cooler - weakens over time and leaks. This leak starts out
slow - and almost forgettable until one day -
when its cold out, and you are in
a big hurry - late for a wedding - when you start the car - the seal blows out -
spraying oil all over the ground, engine, radiator, you, your dog, and the moon.
Yea, its *that* much of a mess when it lets go. Think super soaker on
steroids filled with dirty old oil. So, best get to it before it starts to
blow apart. And at $2, and not much more work then an oil change - its
money and time well spent. Do it now before your dog gets it. Best
of all, when you are done, pat yourself on the back - tell everyone you replaced
a cooler seal - and they will think you are some type of automotive God.
It just sounds cool. Oh BTW - do this at your next oil change, yes - its a good
idea - DO IT NOW!
|
Tools needed: Oil Filter Wrench (optional)
27mm deep socket or 1-1/16" deep socket
6 or 9" extension
Torque Wrench (that can go down to 18 ft/lbs)
Ratchet
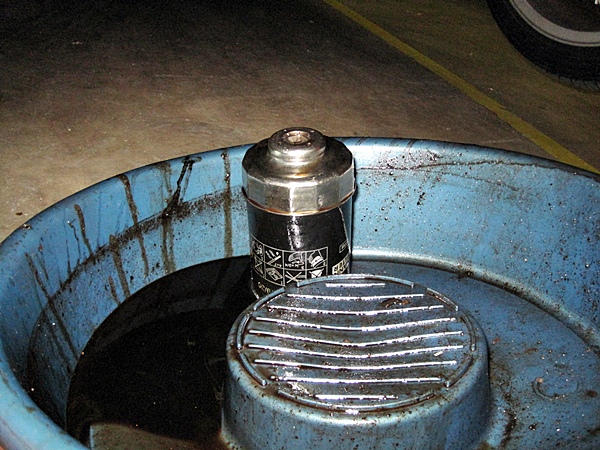
Oil Drain pan
Metric socket set
Rags
Jack Stands / Floor Jack
Small flathead screwdriver/dental pick
Parts Needed:
Quality Oil Filter (I use Mann or Mahle... only..
ever..)
5 quarts of a quality motor oil (I prefer 10w40 in the ABA)
Oil cooler seal (59mm)
(Parts
Link) - note some have "locating tabs" as little
internal ears, these are helpful, but not needed.
Can of Brake Clean (spray solvent)
Time Needed: 30 min, including the oil
change.
|
Step 1 - Look in the right
place. My engine was a mess anyhow - and it forced the camera to take a
blurry picture.
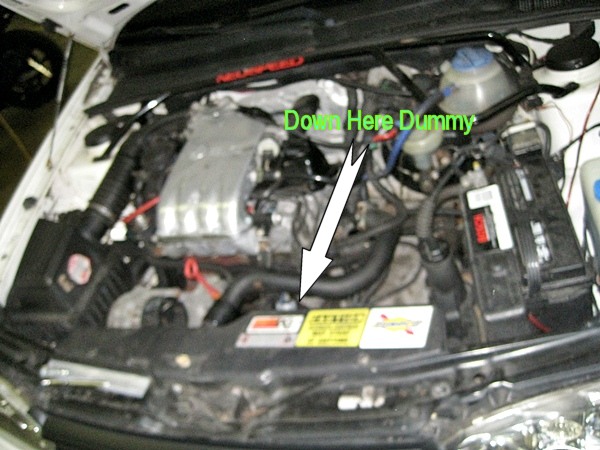
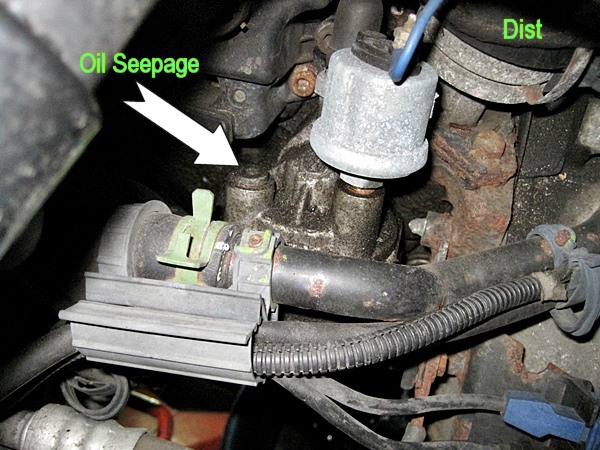
Look down onto the filter and cooler flange. This is
on the front center of the motor. The A/C compressor is to the left, and
the Distributor cap is to the right. My car has an aftermarket oil
pressure gauge/sender - that's the blue wire - your car won't have this so
don't look for it.
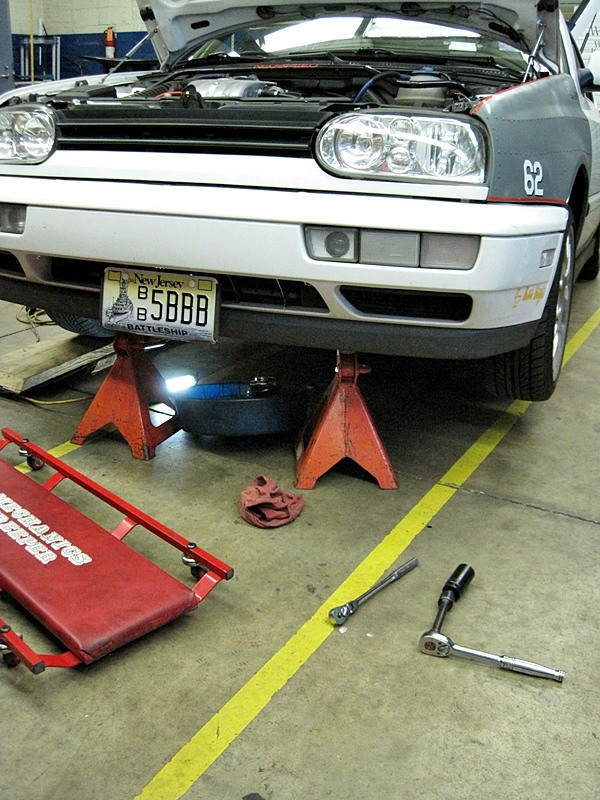
Step 2 - Jack up your car to
change the oil. Replacement of the cooler seal requires you to remove your
filter, so why not just do it all at once.
Hmmm, tasty German filter.. The cap is my filter
wrench.
Step 3 - Look at where the filter screws onto.
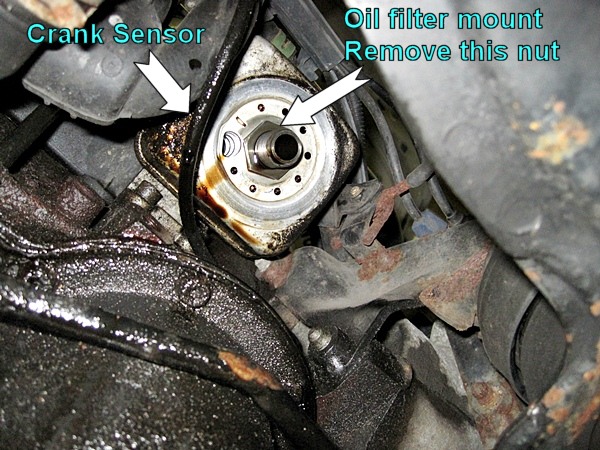
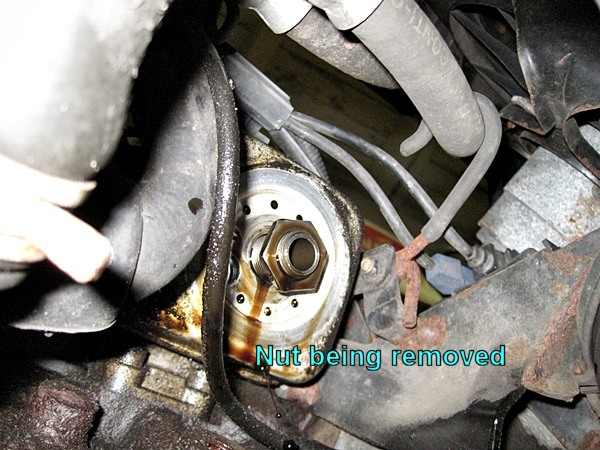
Step 4- Remove the nut (27mm or 1-1/6")
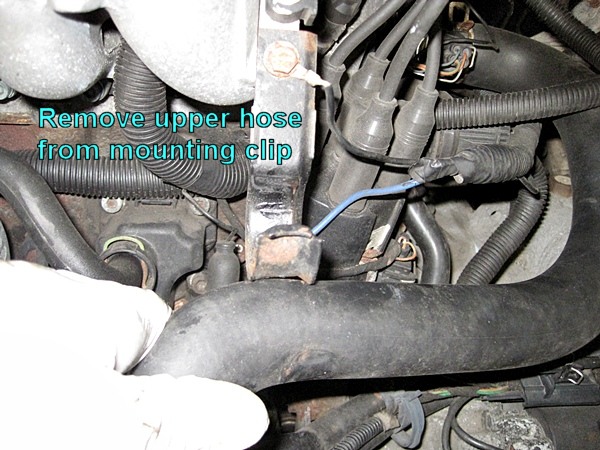
Step 5 - Unhook top coolant
hose from bracket (no tools needed)
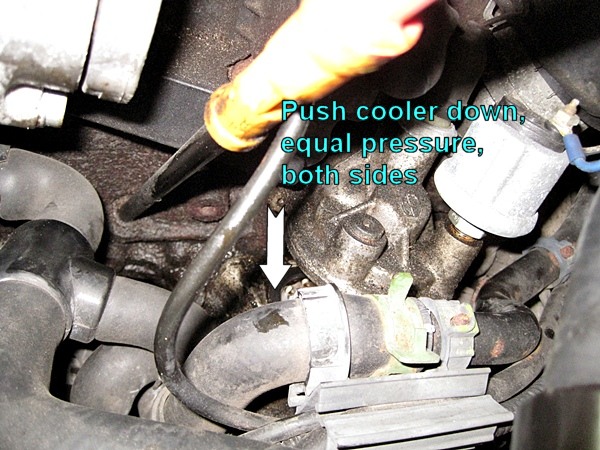
Step 6 - PUSH down on the
cooler - with even pressure on both sides. If you push too hard on one
side, its going to get caught on the threads of the filter mount. This is
ok. Just push it back up a little and try again. Don't force it,
wiggle back and forth if needed. The dipstick and funnel (orange) are in
the center left of the picture.
NOTE: Two other ways to remove the cooler are:
1 - Drain cooling system and unhook hoses form cooler.
This is an unnecessary step.
2 - Using needle nose pliers style vice grips, grab and
spin the center shaft (where the filter screws onto). And unscrew and
remove it. This is not a bad idea, and it does make the job a little
easier - but I did not find the need to do this.
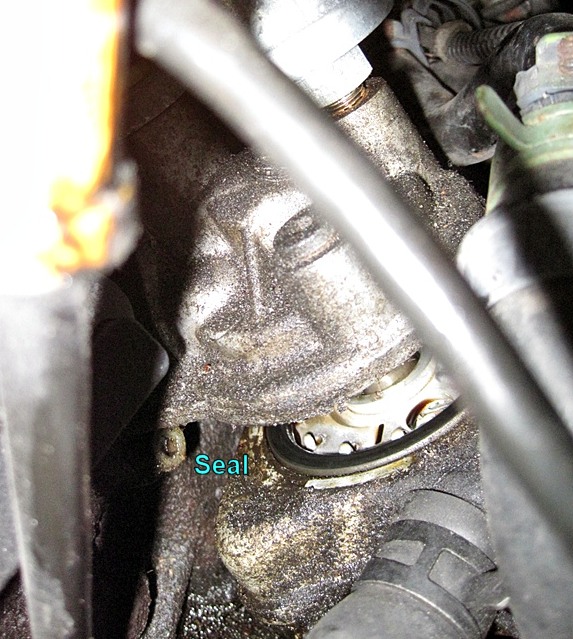
Point and laugh at the old seal. Use your small flat
screwdriver or pick to *carefully* remove the stuck seal.
Yea, this was long overdue. I was lucky, and my seal
just leaked - it never got to the point where it blew out.
Step 7
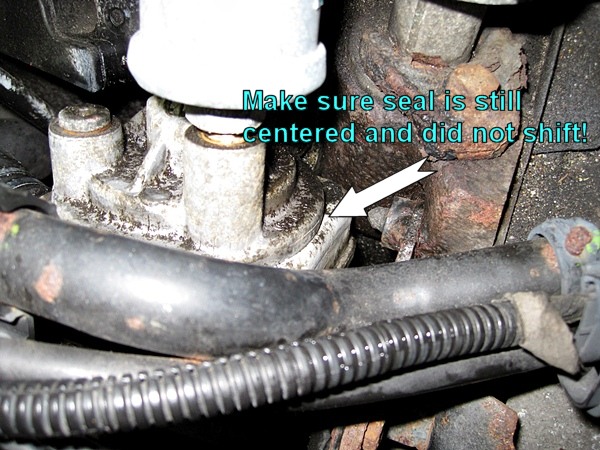
- Carefully install the new seal - and center it onto the cooler.
Use no sealants or RTV!
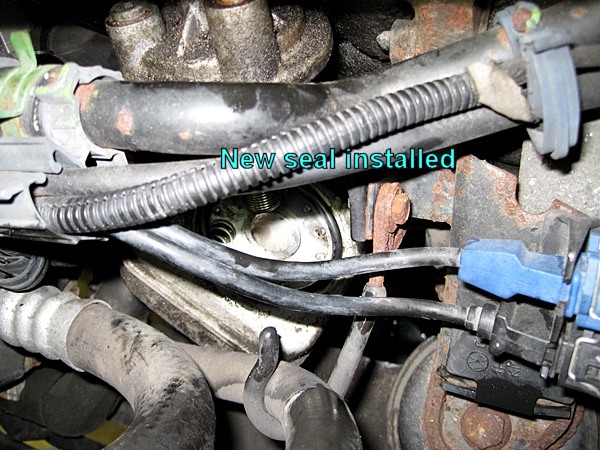
Step 8 - Install the cooler
and reinstall the lower 27mm nut you took off. Torque the cooler nut to 18
Ft/Lbs. DOUBLE CHECK BEFORE
TORQUE THE NUT THAT THE COOLER SEAL IS NOT SHIFTED OR PINCHED.
Step 9 - Start car once refilled with oil and a new
filter has been installed.. Check for leaks!
Home