The
writer of this how to assumes zero liability in how to use this guide, or any
damages that may come from it to you, your property, or others and others
property. If you are uncertain at any point, refer to a qualified automotive
technician.
The
writer of this how to assumes zero liability in how to use this guide, or any
damages that may come from it to you, your property, or others and others
property. If you are uncertain at any point, refer to a qualified automotive
technician.Installing a Satellite Radio Receiver in a 1998 VW Jetta
The
writer of this how to assumes zero liability in how to use this guide, or any
damages that may come from it to you, your property, or others and others
property. If you are uncertain at any point, refer to a qualified automotive
technician.
After a quick look at the differenced between Sirius and XM satellite radio, I decided on Sirius. I am a Howard Stern fan, so is my wife, so I went with the Sirius setup. The receiver I picked out was a Sirius SV-1 unit. The unit comes with everything you need to get it up and working in about 2 minuets from the time you open the box... However I wanted a nice clean install. I will walk you trough the install steps.. Depending on your skill level, you will need a dental pick, and a few screwdrivers.. if you want to get more trick, add a soldering iron.. (again, more later..)
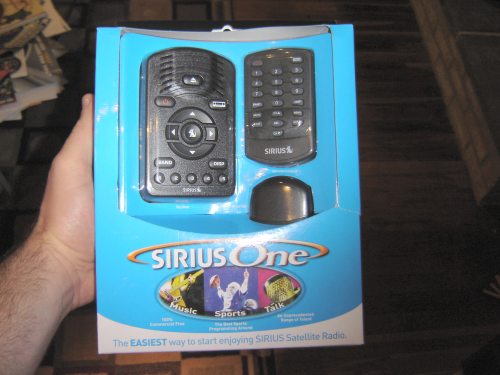
The SV-1 is very small, its the size of a radar detector, and looks much like one. It comes with a suction cup mount, and a visor mount. The display is a nice blue color that will match most newer VWs.. It has a remote (more on this later!) and a 21' antenna, and a cigar lighter adapter. - Note, this car install (GLS) did not come stock with the Fuba Antenna (roof antenna), I have seen where people run the satellite radio antenna up near the Fuba unit. This involves pulling down the headliner and is covered in the GOLF section of this document (to be added later)
|
Installing Adhesive/Magnetic Roof Mount antennas
- (Taken from MECP Study Guide
Supplement) Adhesive and
magnetic antennas share many similar installation techniques, the only
difference being how they are secured to the vehicle. Adhesive mount
antennas are permanently affixed, while magnetic mount antennas can be
easily removed. Here are some important points for installation of either
type of antenna: |

Wash car - sounds silly, but a clean window seal and roof makes this job easier, as well as less risk of scratching paint. I did not do this, and I wish I had before I started.
VW uses a urethane weather seal and a rubber outer seal. You have to pry back the rubber outer seal around the rear window. I used a small dental pick. Be careful, if you look close you can see that the rubber is starting to dry rot (this is a 98 car). If the rubber sticks, I used a spray wax (Turtle Wax Express Shine) its smooth, silky, and does not leave any white stuff behind. The spray wax will help break the "dirt seal" between the rubber and paint, as well as allow the pick to slide. Slide the pick ALL THE WAY where you plan to tuck the wire (center of rear window top, down drivers side into trunk gutter. Don't jamb the pick into the paint or tear the rubber... This rubber seal is NOT the window seal, the window is held in by a strip of urethane, this is merely a piece of trim.
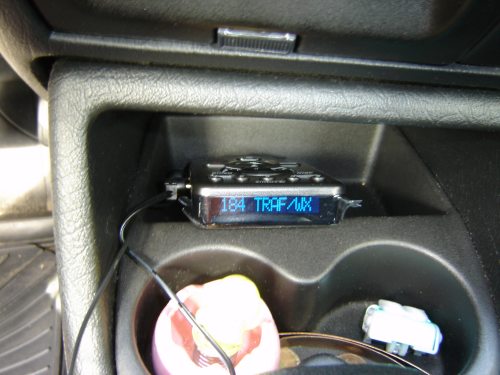
Next wire up the unit, just inside the car, I stuck the antenna out the sunroof. Make sure it powers up and works. All Sirius radios will give you weather and traffic on 184 even if you have not paid for a subscription. Please make sure everything works before you invest time into an install only to find that your equipment is DOA.
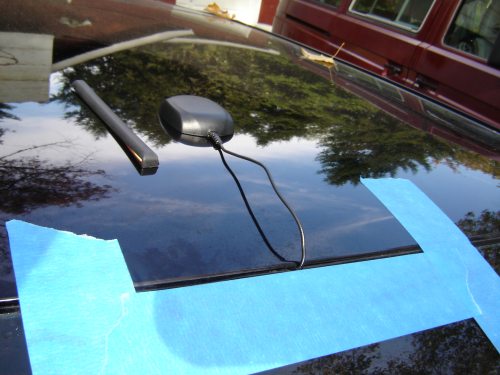
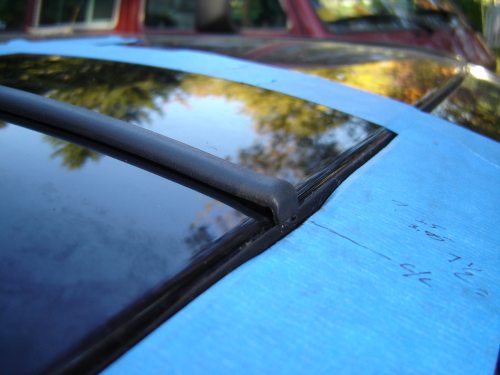
Lay out the length of wire needed for the tail cover. Most installs say that the antenna should be 6" away from the roof edge. I used the blue painters tape to help me measure it (used the 3rd brake light as a center point) and line it up.
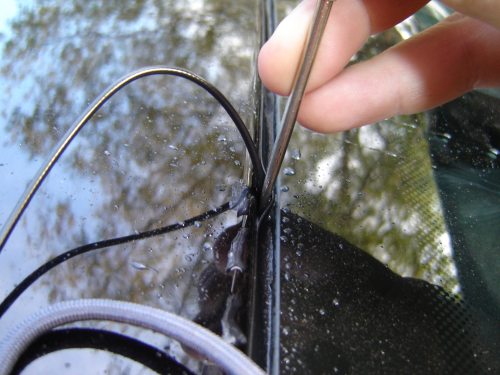
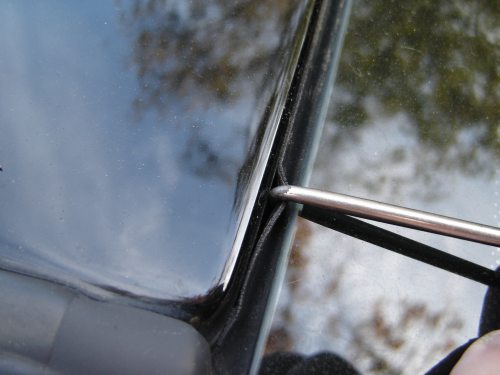
The idea is to tuck the antenna wire into the rubber strip, and down to the trunk gutter. I found again, that spraying (soaking) the rubber and wire with the Turtle Wax spray really helped it all side in. I ran the pick in front of the wire, and then pressed the wire in behind it.. TAKE EXTREME CARE NOT TO BREAK, SCRAPE, CUT, NICK, OR DAMAGE THE ANTENNA WIRE!!!
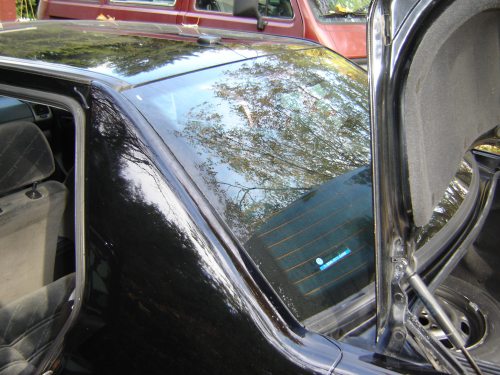
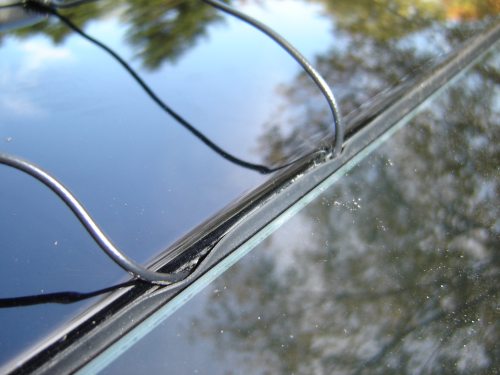
Here we see the finished run, and frankly the hardest part of this job. The antenna has 6" from the roof edge, and the wire is now down at the trunk gutter.
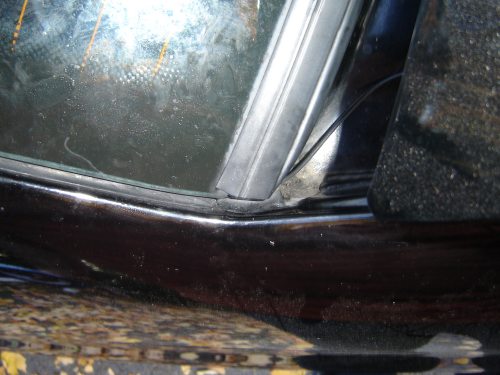
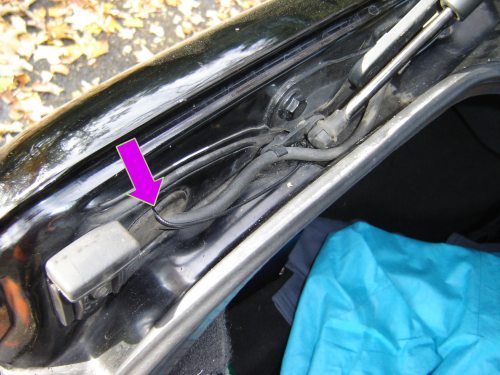
Here is a close-up of how it exits the window seal area. Note, you cannot see it when the trunk is closed.
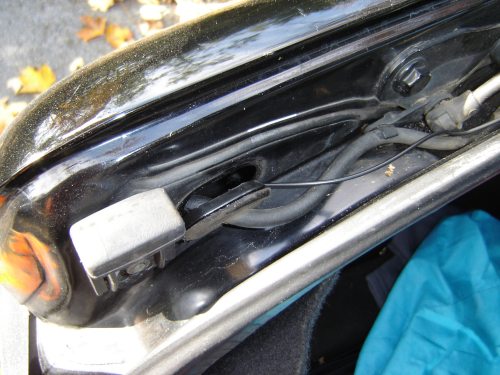
Pop open the rubber plug (and wire conduit/line) on the drivers side rear of the trunk. Pull down (pop off mounting plugs) the carpet on the drivers side rear to pass the antenna down into this area. Don't cut or seal anything yet, we will come back to this later.

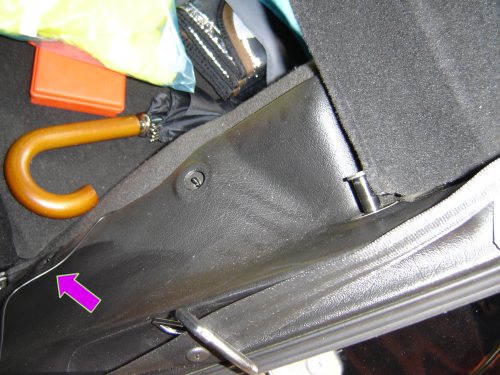
Flip the drivers side rear seat foreword (lay it down), and pass the wire (arrow) underneath the rear drivers shoulder belt. I used a zip-tie to make sire the antenna wire DOES NOT INTERFERE WITH THE SEAT BELT OPERATION! Pass the wire into the passenger compartment.
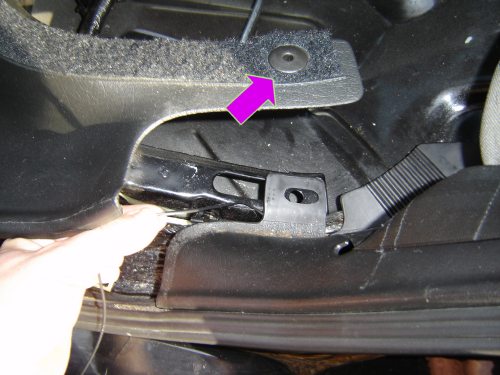
Unscrew the two retaining plugs (one pointed out at arrow, also shows wire run) with the seat folded down. You may need to pry a little on the plastic to run the wire.. just make sure its not anywhere near the seat pivot or seat belt.
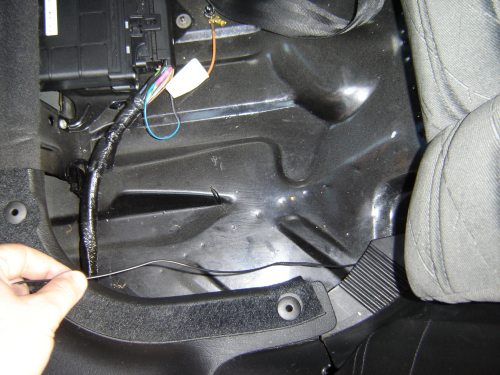
Now flip the seat back up and flip open the seat bottom (or remove it on older models). The two rubber plugs come out (screw out) and then lift of that chunk of trim and pass the wire into it. Make sure the wire will not get pinched where anyone will sit on it. PS - that computer box is the module that controls the automatic transmission.
Running the wire under the drivers side rear door sill. The trim will pop-up with a screw driver, make sure its fully seated when done.
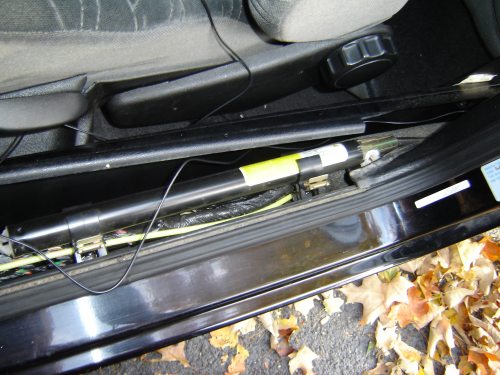
Pass the wire into the driver front door sill area. Again, the door sill trim pops up.. there is a plug near the base of the seat belt as well. I did not have to mess with it. The long black cylinder is the seat belt pyro pretension unit. In event of an impact this small explosive charge will retract the belts an extra 2" to take up all the slack to make sure you are back in the seat. DON'T MESS WITH THIS THING!! Just run the wire along side of it, and again make sure the antenna wire is clear of any moving parts, or mounting clips/screws.
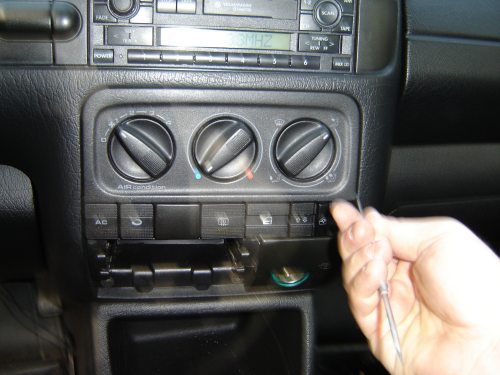
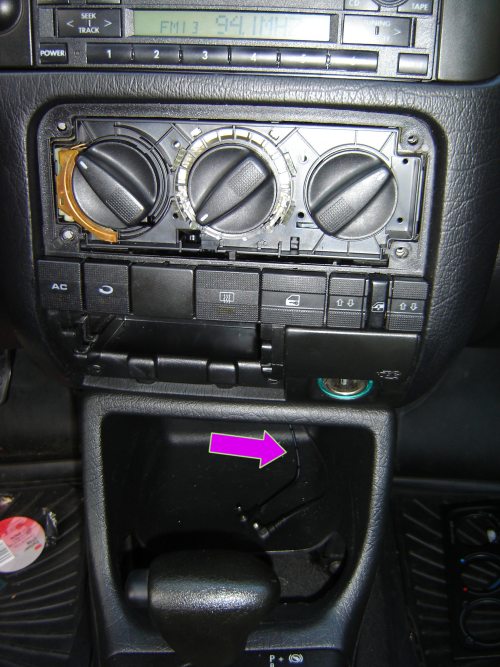
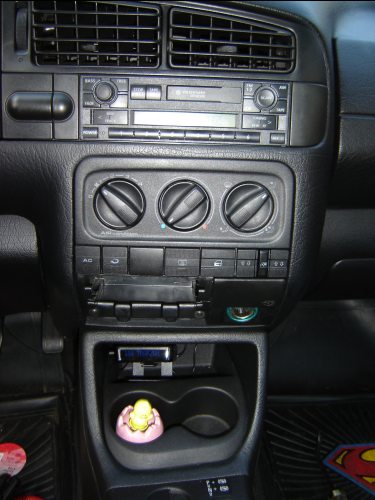
Remove the ashtray, and remove the heater control panel (snaps off) I used a pick to pop it out. Pull it straight out towards you, don't "flip it up". Also remove the center console cup holder (grab it, and pull it out towards the shifter, it will come out..)
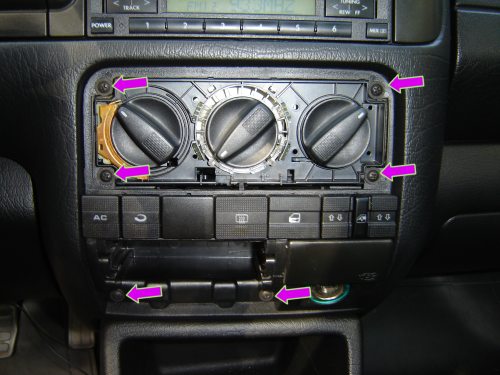
Remove the 6 screws shown.

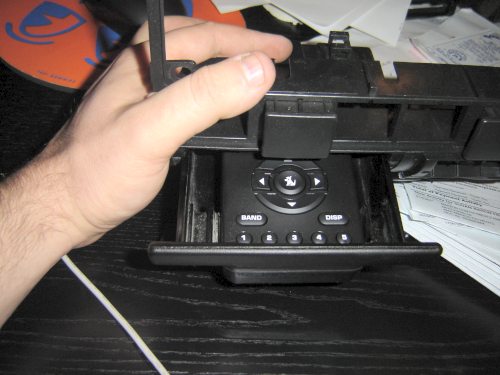
Push back the heater control knobs and gently move the button cradle to the left. Pop-off the rear cover for the buttons. (near where my thumb is on the left)
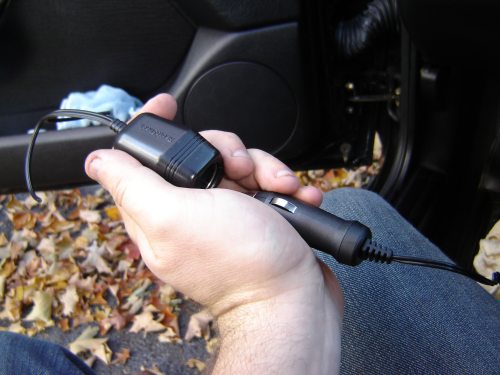
I wanted to make it so the SV-1 turned on/off with the IGN key, and I also wanted to hide the god-damn 6' long power cord. I got a old 12v splitter and then used the female end for this next trick. I did not want to hack up the new cord that came with the SV-1 in case I ever wanted to transfer it to another car..

I used the rear-defroster circuit for power (Black/Yellow), and the cigar lighter for ground (orange) or (brown) depending on how you look at it.. I cut the wires, and soldered in the cigar lighter adapter.
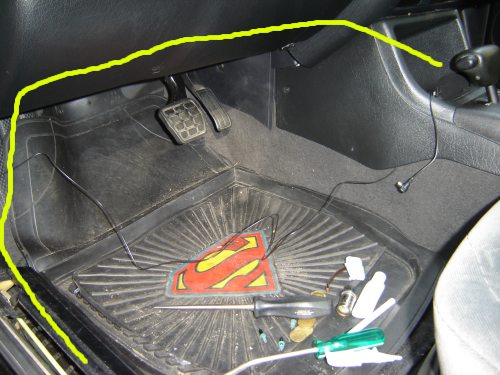
Run the antenna wire up and under the drivers side kick panel (1 screw), and then under the fuse box, under the drivers side finish panel (above where your feet go) (2 screws). Feed the wire into the center console area. I fed the wire into the small hole in the deep rear of the center console where the clip for the cup holder mounts (this will make sense once you pull it out). Wife is a comic book fan.
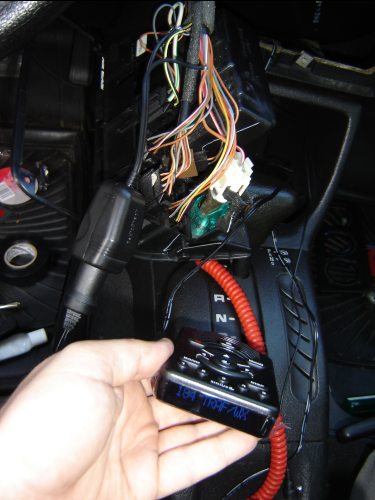
My mess works when I turn on the ignition key.
|
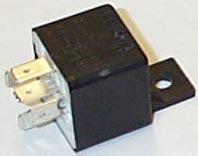
NOTE :If you have an aftermarket head
unit, you can get the sat rad to turn on with the head unit. Wire up
an ISO relay (From Radio Shack, also known as a "30 amp automotive relay"
and use the aux power output from the head unit (such as to power on an
amp). This way the radio with also power on the sat. unit.
Pin 30 +12 Volts (Battery +) (from radio,
or cigar lighter) |
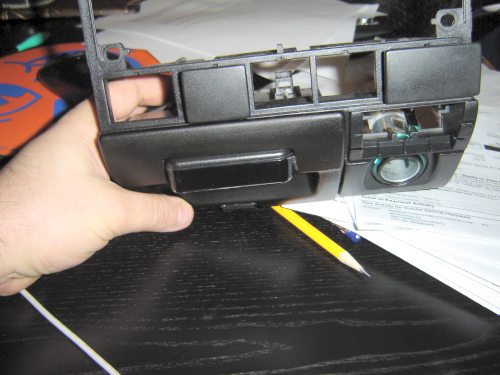
Carefully snap back on the rear button cover, and tuck the power setup behind the dash (TONS OF ROOM!). Run the SV-1's power wire into the same opening where you ran the antenna wire (arrow). Were done here. You can button this back up. You can even snap back in the cup holders. I had enough room for the wires to clear along with the snap-lock for the cup holders. No modification needed. If you did it right, you should have about 2' of left over wire for the antenna.
Ok, back to this. If you need more or less slack you can give/take from the trunk gutter. This is why I did not seal it up yet..

Measure, and center everything up. Do a dry fit of everything. Use a alcohol rub to prep the car's surface for the sticky adhesive of the tail cover.
Measure and make sure your tail cover fits. Note my center line marks. Do a dry fit first before doing anything drastic (cutting or gluing). Again, prep counts here. The 3M adhesive is very VERY sticky, and if you lie it down wrong, forget it, its not coming back up. Be gentle with it until you are 100% sure its where you want it to go.
I cut a small slit into the trunk plug so I can press the wire into it. MAKE SURE THE ANTENNA WIRE DOES NOT GET HUNG UP ON THE BRACKET OR HINGES!
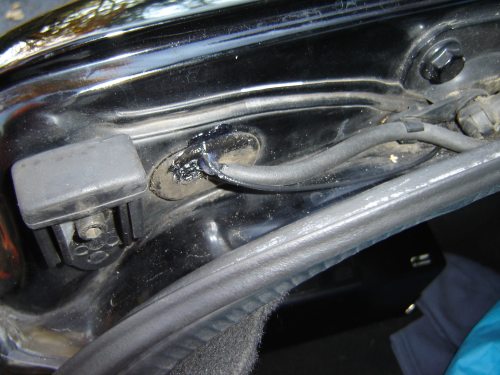
I used a small dollop of marine grade sealant onto the trunk plug where the wire runs into it. We all know that VWs don't need any extra water leaks..
Everything is in, unit is powered with IGN key, Set FM radio to 88.1 Works 100% perfect, a job well done. Happy chick can bob around and jam all day listing to commercial free radio...
Now on to the cool part..
Later I built the unit into the ashtray. I had to cut a hole in the tray, and open up the back of the ashtray to make it fit (I also had to re-route the power and ant wire.. no big deal). Used a Dremel moto-tool, files, and some shop time.
Blends in soooooo nice..